I’ll be honest.
When we decided to redo our dining room, I was really thinking in my head, “oh, sure, we’ll just pop a little paneling up, build some built ins and a seat, build a table…you know, won’t be a big deal at all.”
It’s certainly been smooth sailing, fun work, but it’s still time consuming and detail oriented. Finish work can be the best. It can also take the longest.
Hence…our how-to posts will come in waves, so as not to kill you with picture/instruction overload.
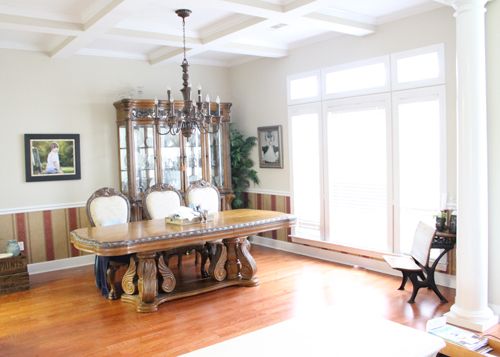
Remember our dining room before?
I remember telling Layla that I was totally over the heavy, weighted down furniture and chair moulding and wallpaper. I envisioned a light-filled, planked-wall, farmhouse-elegant space.
This is why you need a friend who talks design and house-stuff with you. We just talked it all out in about 30 minutes.
me: “I really want planks on the wall, but I’m kind of wanting them to hang vertically. I saw some planks in varying widths as a backsplash and I loved it.”
Layla: “Awesome…plus that’ll just draw your eye up to the cool coffered ceiling.”
me: “I know!”
Layla: “Hmmm. What if you just installed that ugly paneling and painted it white??”
me: “Well….I guess so. That would be way easier (and probably cheaper).”
You get the idea….the whole plan was born in about half an hour, and it was just flat-out nice to have a second opinion on all of my ideas. Plus, this handy friend can actually draw it all out in Photoshop…so bonus.
I have always loved planked walls (hence–the floor to ceiling planks in the writing room). Here were some planks that got me going…
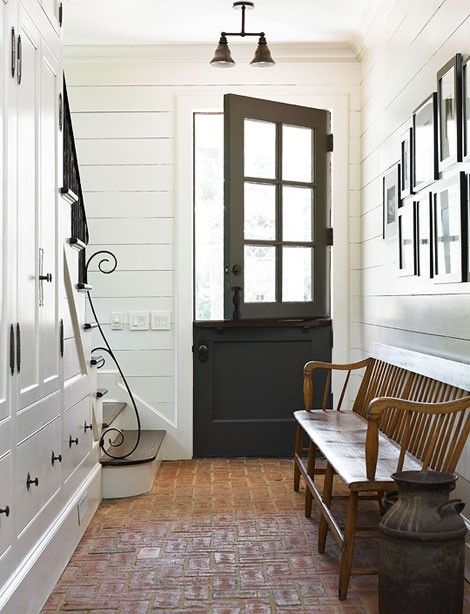
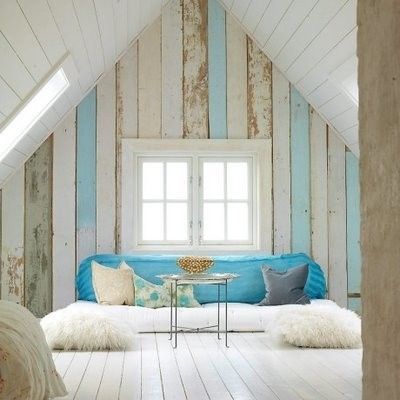
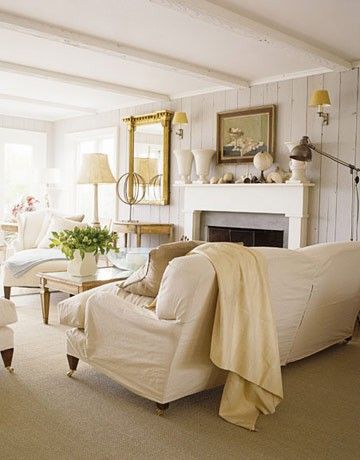
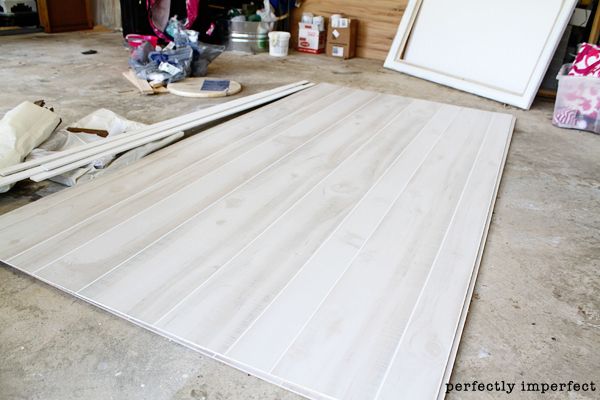
We had fully intended on buying the orange-speckled laminate giant of the 70s, but when we got to Lowes, we found this whitewashed pine version instead. At $14.98 per 4 x 8 sheet, it was a steal when compared to adding real wood to our walls!
Let’s show you how we did it, then.
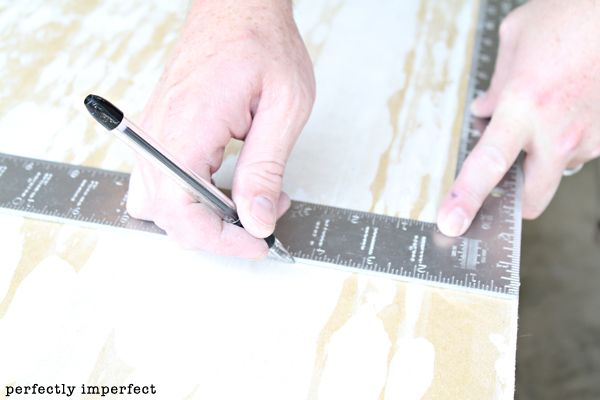
First, because we had 9 foot walls (from baseboard to moulding), we had to cut a one foot piece to add on top of our bottom piece of paneling. We simply drew out a 1 foot section with a ruler.
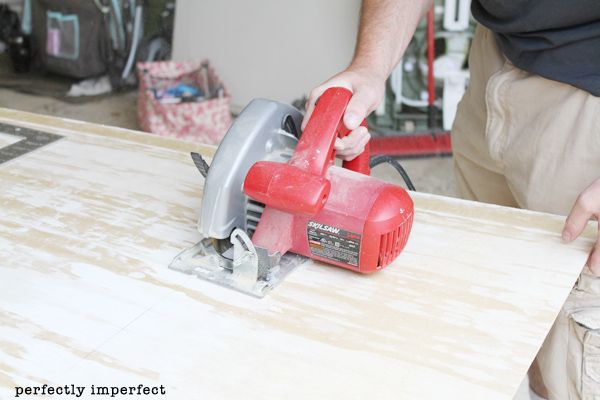
We then trimmed off all the pieces with our Skil saw. It’s my favorite tool.
Second to my Purdy XL Cub.
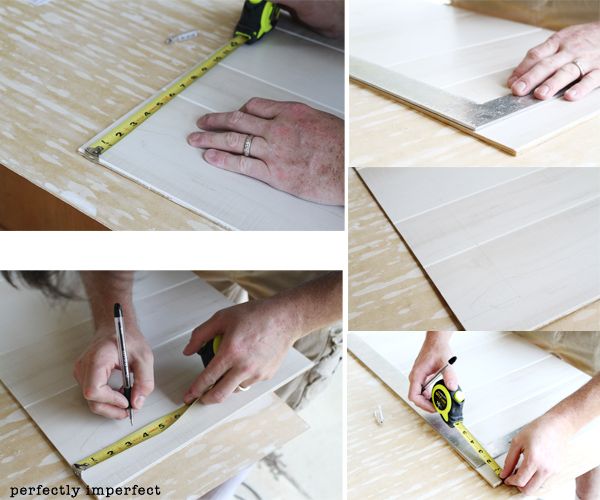
We also had to work around the coffered ceilings (meaning 6 inches of inset ceiling grids hitting the wall). To fit it snugly around each ceiling drop, we simply
-measured over 6 inches,
-and down 3.
-marked our level cutting lines,
-double checked our measurements,
-and cut with the Skil saw again.
*That’s also the great thing about this paneling: it’s super thin, so you’re able to rip through it with a circular saw like a butter knife to melted butter.
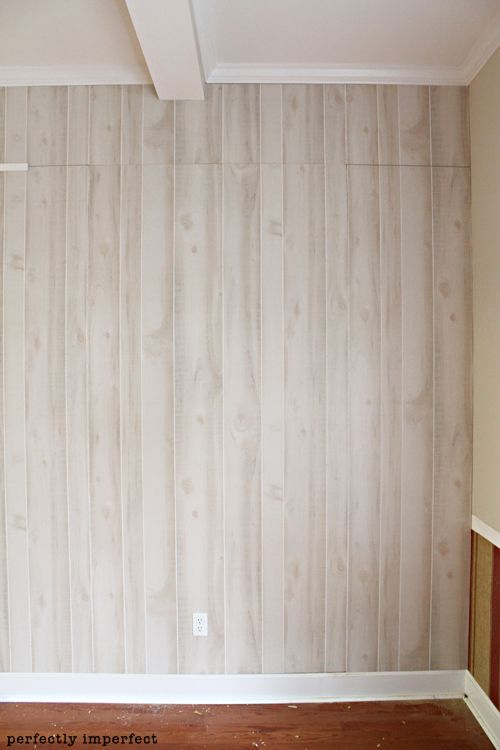
For the hanging…super simple. You just nail that stuff in the wall. It really is that easy, but here’s some tips we learned along the way.
-Buy 2 inch white paneling nails or 2 1/4 inch finish nails for your nail gun (we used some of both)
-Because studs are begun in one corner of a room, you’ll want to find that corner first. If not, you may end on a wall where the stud is not spread 16 inches apart (a.k.a your paneling edge is flapping in the wind). I speak the truth.
-If you aren’t patient enough to find the starter stud, ahem, like us, then you’ll want to heat up your hot glue gun to tack any flapping parts down. Works like a charm.
-Use a level as you hang each sheet. I know it sounds crazy, but not all houses or baseboards are level. Using your level will insure you don’t end up with angled plank lines. Fill in with caulk if you do have to adjust your sheet above your baseboard. (we actually only had to do this once–and once you level your first one, you simply butt each sheet up against the next.)
-Attach the bottom pieces first. This will allow you to slip your top pieces in easily (and level).
-Simply measure where to cut out your outlet holes. We were able to use a box cutter here to get a very precise cut. (MATT TIP: He says you can buy a tiny hand saw called a Sheetrock saw for around 13 bucks that will come with several blades if you want a fancier tool that a box cutter 🙂 )
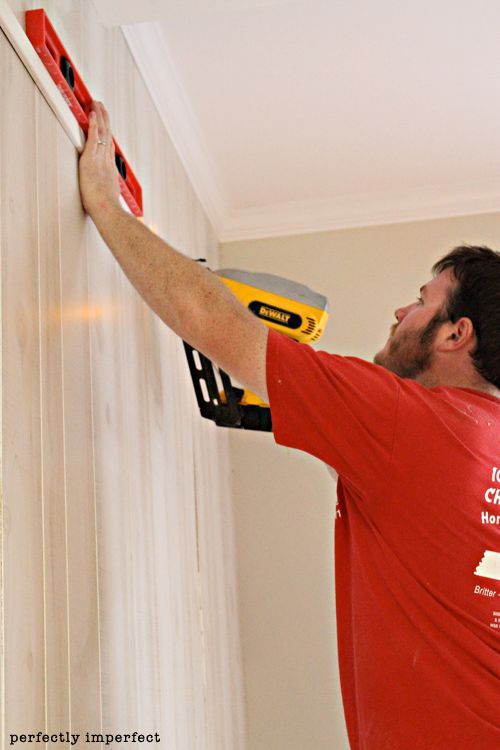
Now it was time to cover that seam at the top of the wall. We purchased 3 7 foot lengths of 2 inch lattice trim (which is typically lying right beside the paneling in your home improvement store).
Again, using your level, simply nail it in to your paneling to cover the seam.
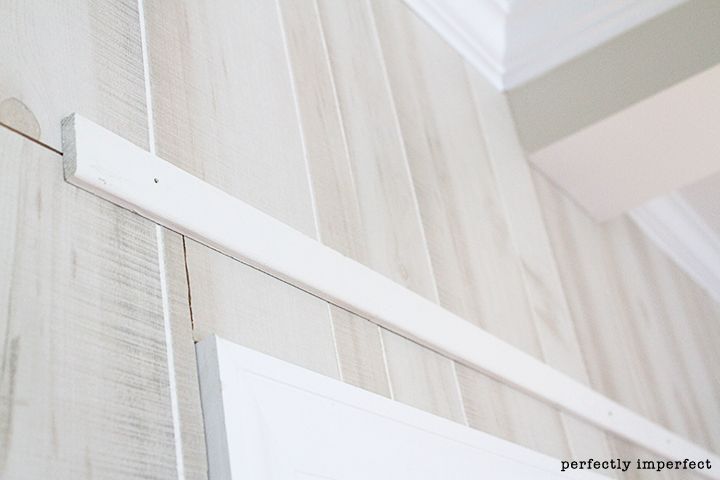
Here’s where many would have spackled those nail holes, but we didn’t. We didn’t even spackle or caulk any edges or corners. We wanted this paneling to look as much like authentic wood as humanly possible. The nail heads and breaks in the paneling added to the overall look we were going for.
That’s it, my friends.

There’s the business of painting it, and that’s a whole different post. (Just think–you’ll get it all hung and painted and immediately get to stick tape all over to decorate for a party.)
There’s also the business of the A-MAZ-ING built ins my uber-talented husband built for us. He gets more and more talented (and supportive) every single day, and I love working with him. If only we could do this every day, all day long!!
Kevin and Layla came and shot a sneak peek of those built ins for you…
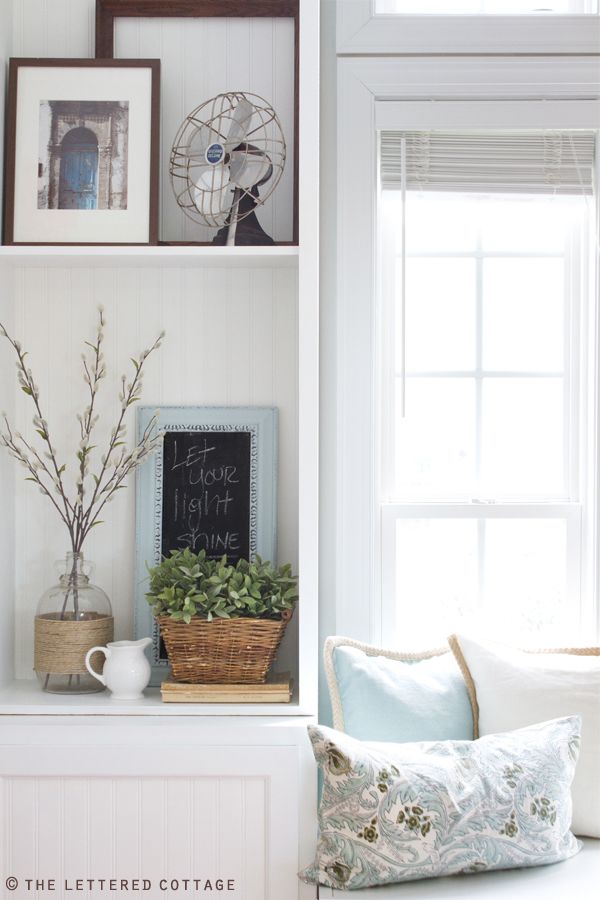
See what I mean?? He did beautiful, custom work….I’m so thankful for him. And those built ins.
🙂
(P.S. Wanna know how to build your own inset shaker-style doors or hidden shelves? Think I’m going to let Matt take the reigns and write you a how-to. Sound ok?)
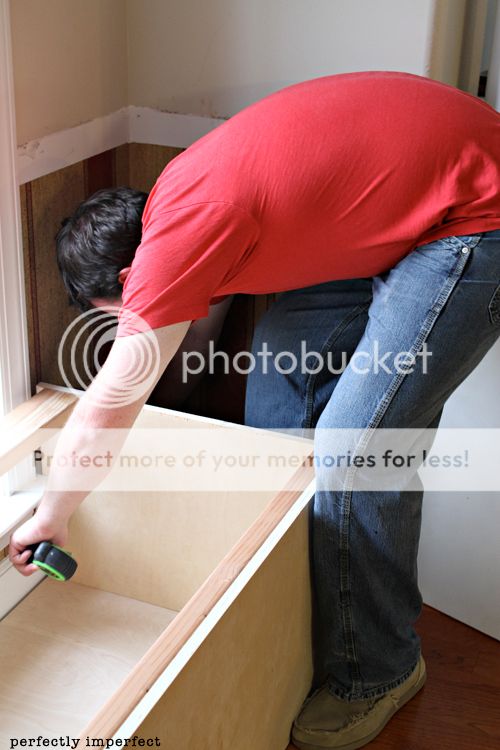
We’ll also show you some tips for building your own bench seat, and rumor has it there’s some reclaimed wood around here just waiting to be turned into a farmhouse table.
Man, I love decorating.
🙂
*Cost Breakdown:
8 sheets of 4 x 8 paneling ($14.98 each)- $119.84
3 lengths of 2 in. lattice trim ($5 each)- $15.00
pack of white paneling nails- $4.99
Total= $$139.83 = Planked Wall Gorgeousness
(I did not include things like the level, box cutter, hot glue or nail gun because we did have those things here already. Don’t forget to budget for those if you don’t have them in your existing pile o’ tools.)
**linking to:


What a great way to spend less and still get the look you love! I love this look, and I really like the lattice trim rail to cover the seam. Great post and great blog.
It is so great to see folks that aren’t afraid to try something. Way to go with the paneling. It looks great! Way to think out of the box. It’s so inspiring to watch creative people turn ordinary to extraordinary.
Oh my gosh Shaunna! What a great look for a super price! I was just texting my husband early this morning on some beadboard options but you may have steered us in a different direction! Thanks for the tips and the tutorials! We appreciate your inspiration!
Looks great, Shaunna! I have been holding my breath waiting to find out how to age wood for a table! Do tell…..pleeeeeease! LOL
Amazingly beautiful in every way!
I am always in awe of projects like these done by those who are skilled! Thank you for sharing!
It’s really, really fabulous! Great job!
Love the look of the word paneling–I can’t wait till I have a house!
It’s gorgeous!
I just love the look, and so appreciate your spelling it all out. I think I’d love to do this for one of our bedroom walls…or maybe a bathrooom…or…or…And your built-ins? Don’t get me going on how awesome they and your husband are. My husband CAN do all that (being a very picky engineer) but he just doesn’t love the woodworking-what’s up with that?? 🙂
So gorgeous!!!
Love this look and the white is absolutely stunning!!
Deborah xo
It’s looking beautiful! Can’t wait to see the finale.
I can’t wait to get to the point we can do some finishing. I need the builders and all the dust out of my house. Your pictures are giving me faith that we’ll get there at some point.
I can’t wait to be done with apartment life so I can do projects like these!
Who knew paneling could look good and fresh again? I really like this, it fits perfectly with your current style. I’m looking forward to seeing the built ins and farmhouse table.
Love it! Your tutorials are always so good! Thanks for sharing this one! This is a stunning addition!
Please tell us how to make the cabinet doors! Please! Please! Please! 🙂 We re-did our kitchen on our own last winter (took out a wall, new appliances, counter top, backsplash) but have been waiting and wanting to make new doors for our existing cabinets. We want to do inset shaker style doors but just can’t figure out the whole inset thing. I look forward to Matt’s post!!! 🙂
Looks absolutely amazing, Shaunna! I cannot wait for Matt’s tutorial on the shaker style doors! We are debating on what to do with the doors in our linen closet & this might be an amazing option! Thanks for the continued inspiration!
Shaunna! This is amazing. As if we should expect anything less from you. Thanks so much for taking the time to include the step by step for all of us.
These walls are so dreamy!!! Cant wait to see what else you have up your sleeves!
The paneling is looking so pretty! And the birthday party setup was precious too! 🙂
Such a giant impact for little cash. I really love how your room is turning out. I know it will be stunning!
It looks amazing and the seam trim looks like it belongs.
Can’t wait to see the entire room 🙂
Great tutorial! Thank you!
finally a follower! I did not realize that I wasn’t already! thanks for this post. I have it bookmarked. Have a great night. Stop by Fieldstone Hill anytime!!
– {darlene}
fieldstonehilldesign.com
I know I’m late to this post, but I just found your blog from another blog link.
I love how this paneling turned out. Good point on leaving the edges where the paneling goes together, that really does make it look more “authentic”.
This looks like a great project!
Now I’m off to see more of your blog!
-denise
What a fab team you three make! (you, hubby, Layla) 🙂 LOVE your tips on leaving all the imperfections too.
Donna
Thank you, Donna! We are super excited to finish our reclaimed farmhouse table, and it’ll be finishing touches after that…thanks so much for stopping by! Your comments made my day!
🙂
shaunna
I need to redo my basement home office and really could not decide how to go. After reading your article I am also going to use this panel and follow your advice. Great article and thanks for the advice!
hi!!!
I’m gearing up to add paneling to our kitchen walls. You don’t know how relieved I am to find beautiful posts like these to help me feel like it can be socially acceptable, and beautiful when painted. Thank you!!
One picture of the finished dining room was not enough!! More pics please!!!
Sweet blog! I found it while surfing around on Yahoo News. Do you have any suggestions on how to get listed in Yahoo News? I’ve been trying for a while but I never seem to get there! Thank you North Richland Hills Roofing Contractors, 6709 Starnes Rd., North Richland Hills, TX, 76182, US, 817-330-8009
Your blog and images are very good. Your post is very useful and it will be help full to get some ideas to decorate my home.
Come across this great site and ordered a steam
shower and never glanced back, incredible content on this site can not thank you
enough
Awesome! Do you need to do anything special with the outlets since it will be thicker than the drywall?