
Whew.
I’m tired.
And I have missed you guys!! I know I’ve been around, but I have been so busy these last couple of weeks, I have barely gotten to read a few posts and certainly only write a couple.
I’ve been painting a ton (post on that to come later today or tomorrow) for one client that I’m sooo excited about, preparing for a little cupcake’s birthday party, traveling, hosting a class at our house on Wednesday nights for the college and youth, working away at finishing the attic, tot-schooling my almost 4 year old, and desperately trying to catch up on So You Think You Can Dance.
Just kidding about that last part….although, I would like to make it through one episode.
On to the daybed….I haven’t decided how to finish it, and I’m just tired of waiting to show you guys. Maybe you can give me an opinion.
Okay, way back when in January, this is what my mom’s doors looked like….
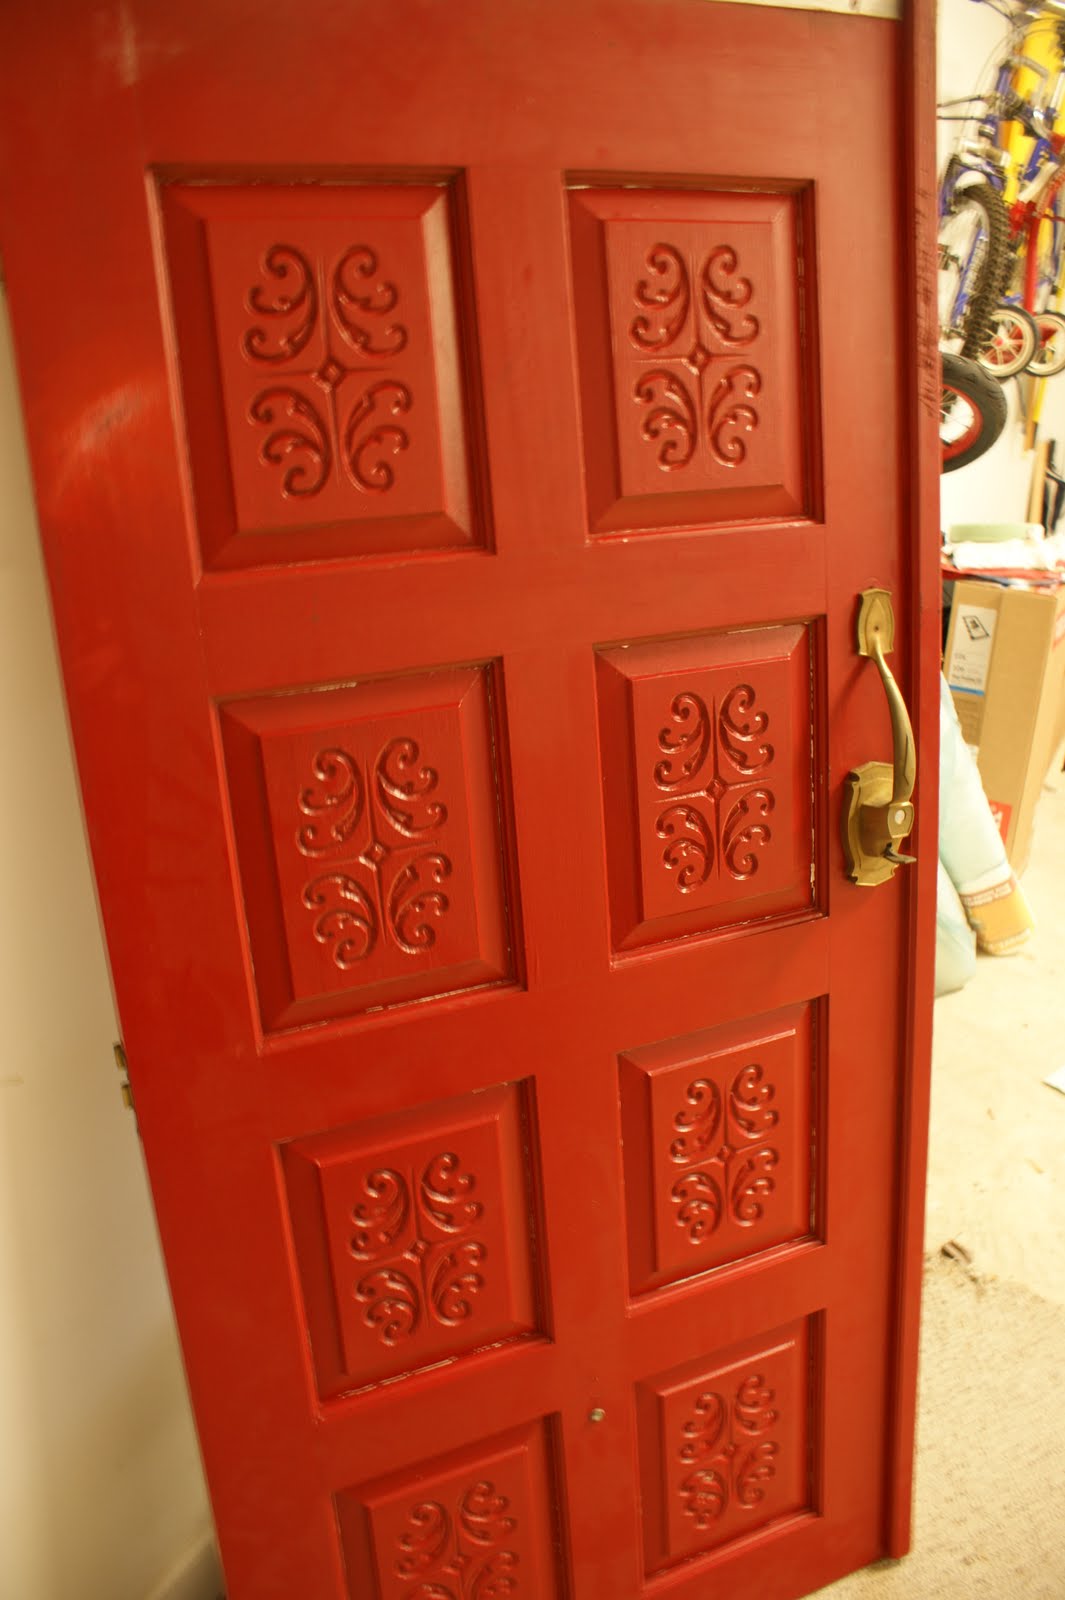
These were on my house growing up until I was 12 or so, and I always thought they were beautiful. At Christmas, I found them laying in my parents barn, and I got a bit of a twinkle in my eye.
The plan had been originally to use them as doors in our attic, but too much door for too little space. We have those tiny angled doors, and these monsters were not fitting. Period.
And then my mom, oh, my mom, had the lovely idea of turning them into a daybed. I had picked out the one I wanted, but even on ebay it was $6-700, and that was hurting my heart just a bit to spend that kind of money on one piece.
So, with some time and a little bit of prayer–because we were quite scared that we would ruin them after that first cut–they went from this….
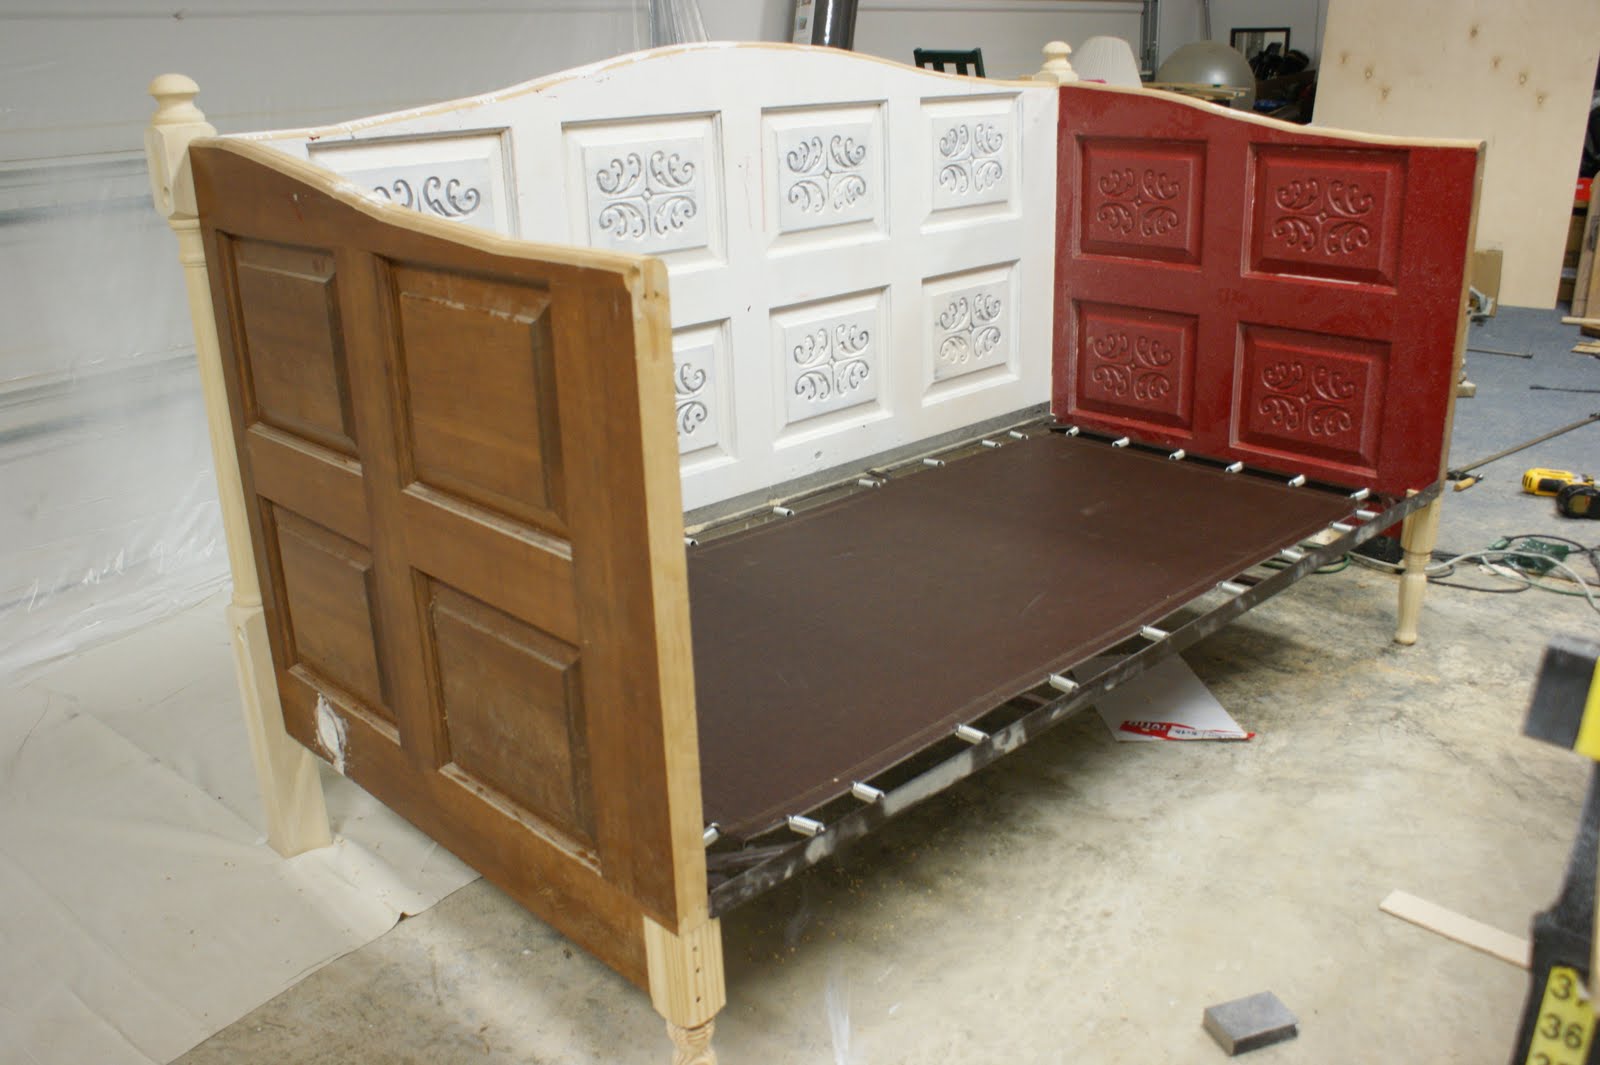
to this….
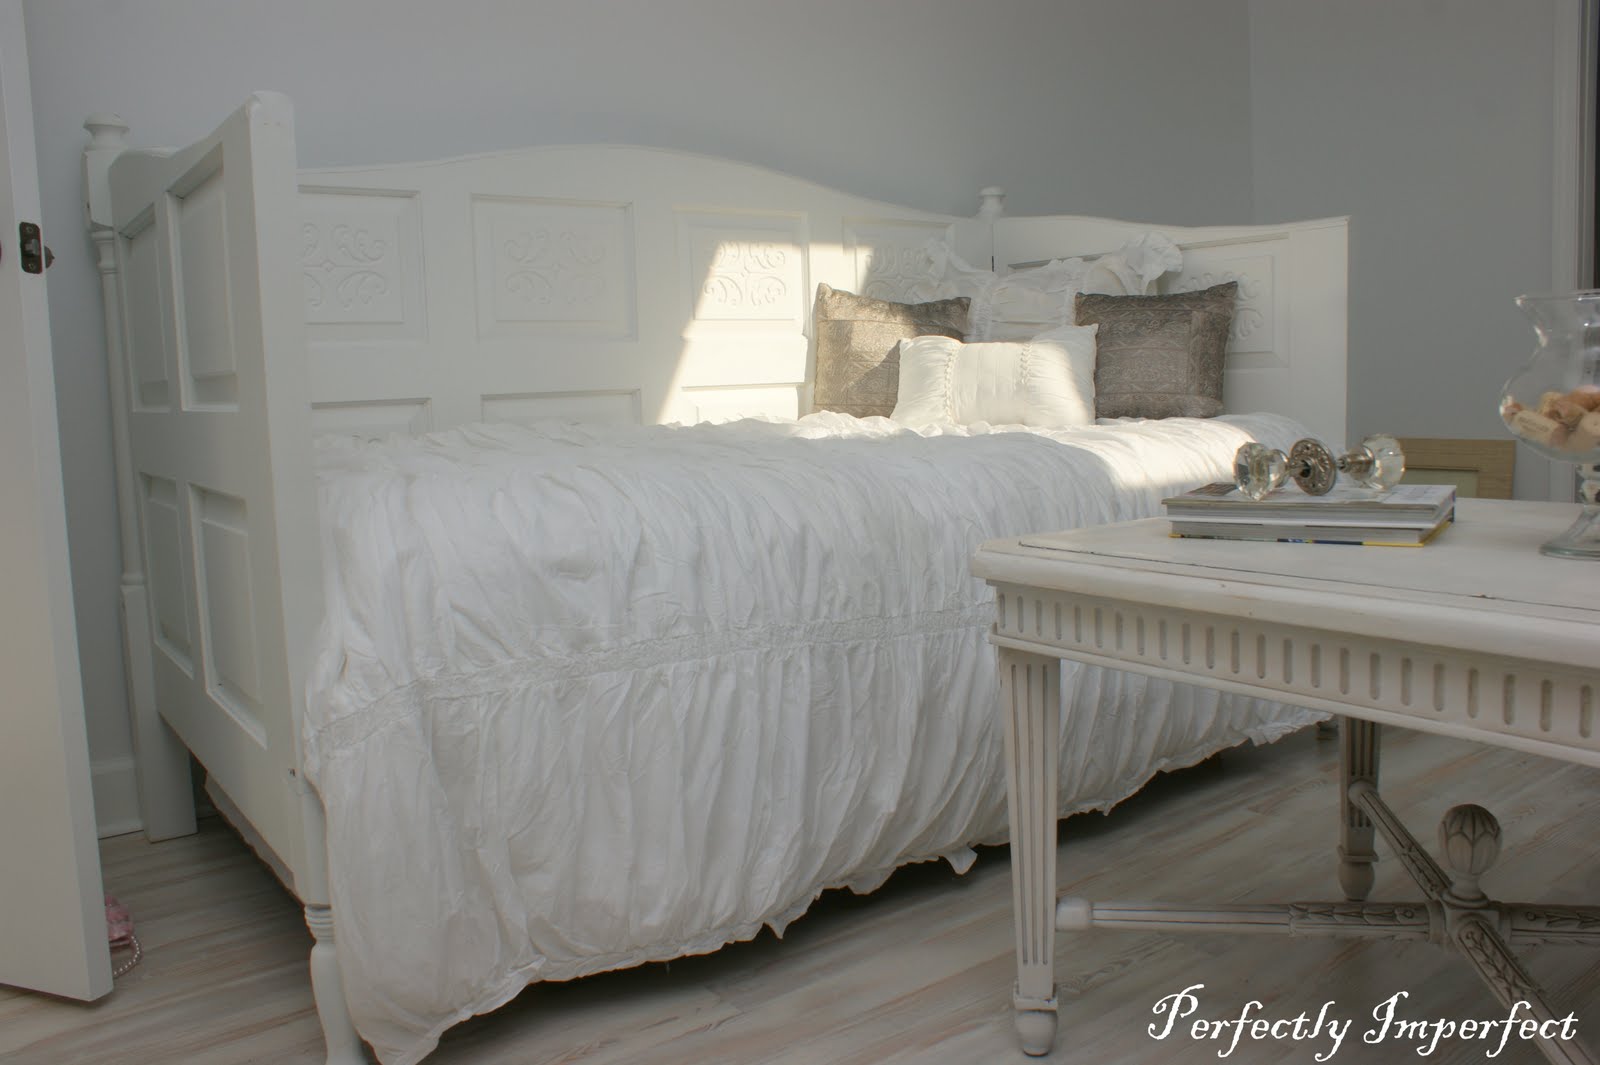
As you can see, my writing room is still not finished, but like I said, I’m too impatient to wait anymore. We’ll get to a completely designed and decorated room one day….and maybe even have a bedskirt. 🙂
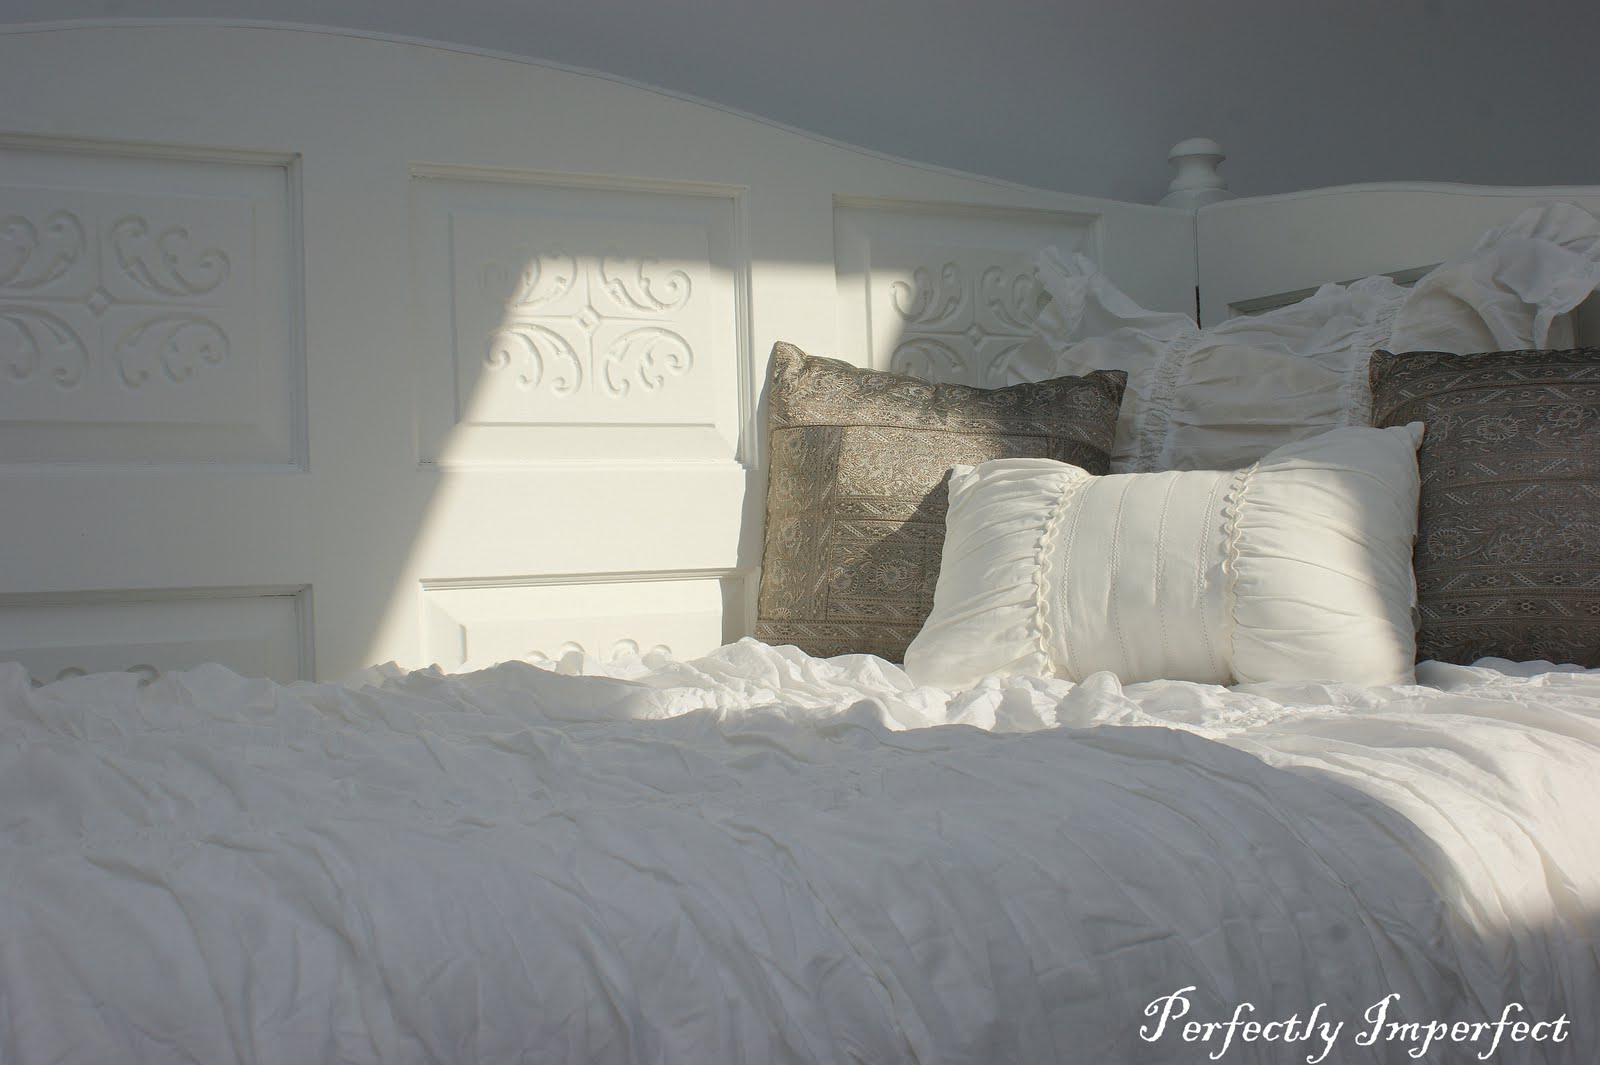
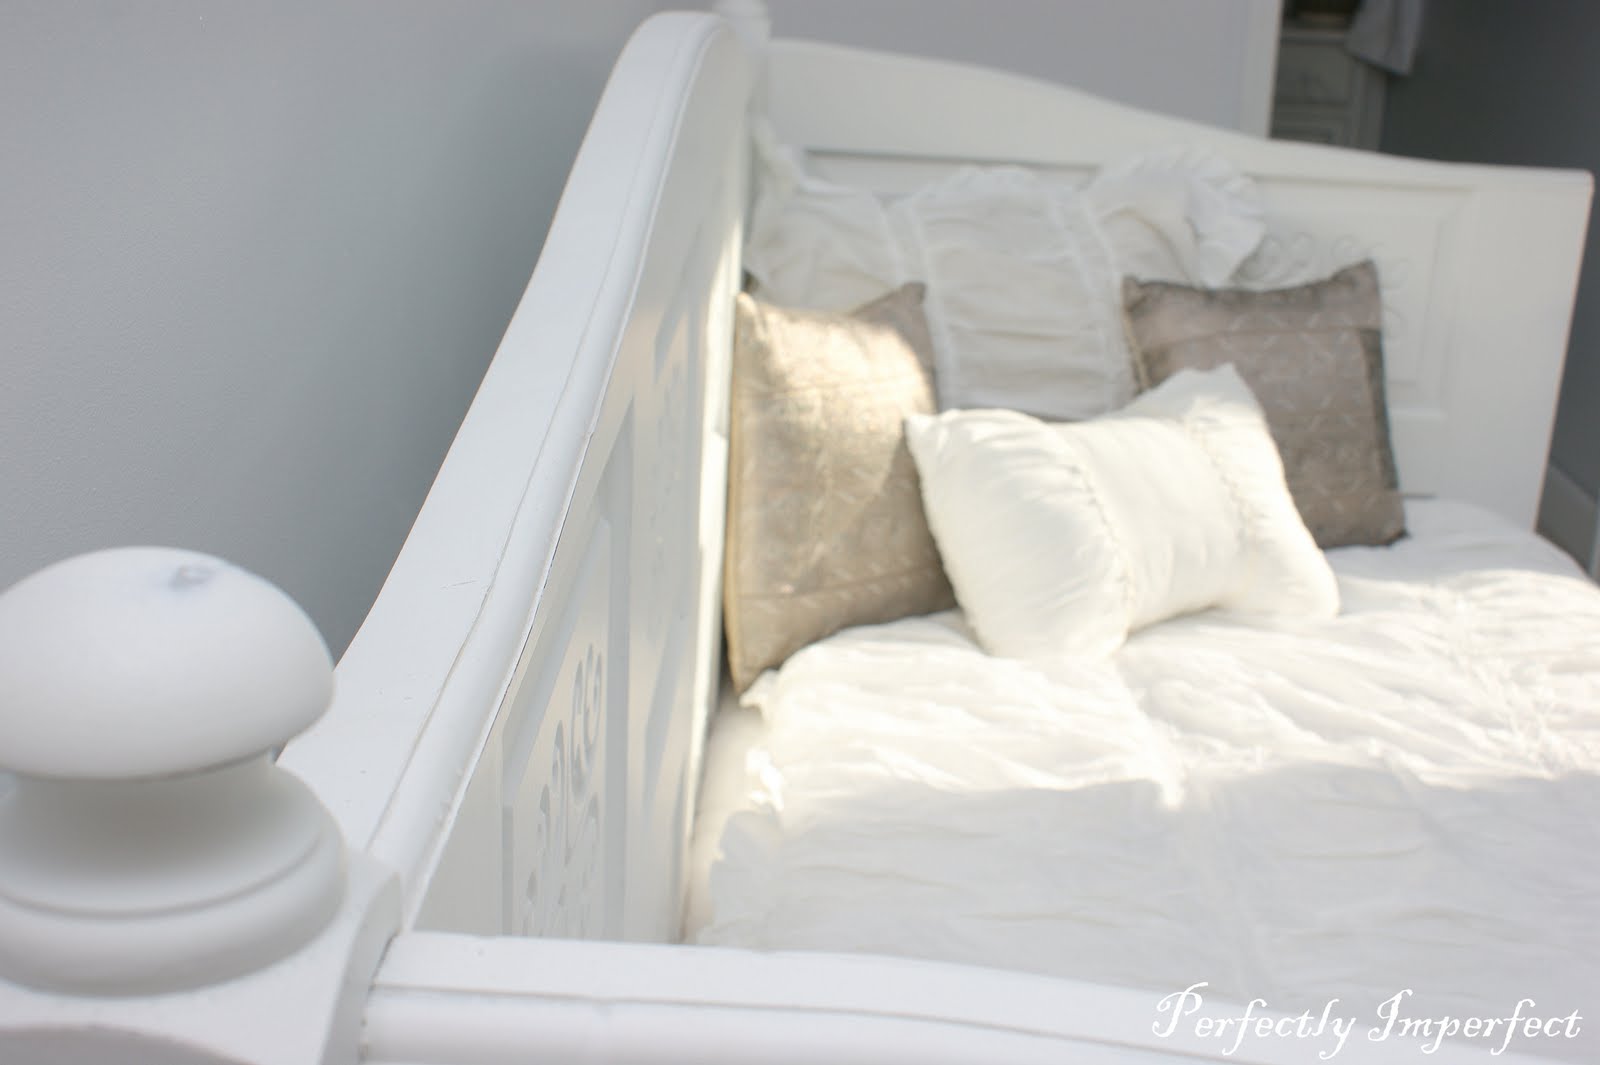
I love its heavy lines, and the delicate details on the inside panels. One day I’d like to see it filled with cushy pillows and layers of bedding. Again, that day will come. These that I pulled from around the house will certainly do for now. The bedding is Simply Shabby Chic smocked duvet and sham–found on Ebay for $24.

This is where I’m stuck. I wanted to distress those grooves really well, but there’s a problem. That red (it’s hard to see in the picture) still bleeds through. Two coats of grey high-hiding primer and 3 coats of white later. I’m done with base coats. End of story there. So it’s either use the dremel (I’m going to do a post on that soon) and barely apply pressure and again with the praying, or glaze the grooves.
I had originally wanted to glaze the entire bed. But….I had a dresser-look a like (that’s really lots of storage) made and it is grey-glazed. I really don’t want the pieces to look very matchy-matchy.
So….what do you think? Distress the grooves ever so slightly or with a steady hand glaze only the panels, leaving some in the grooves?
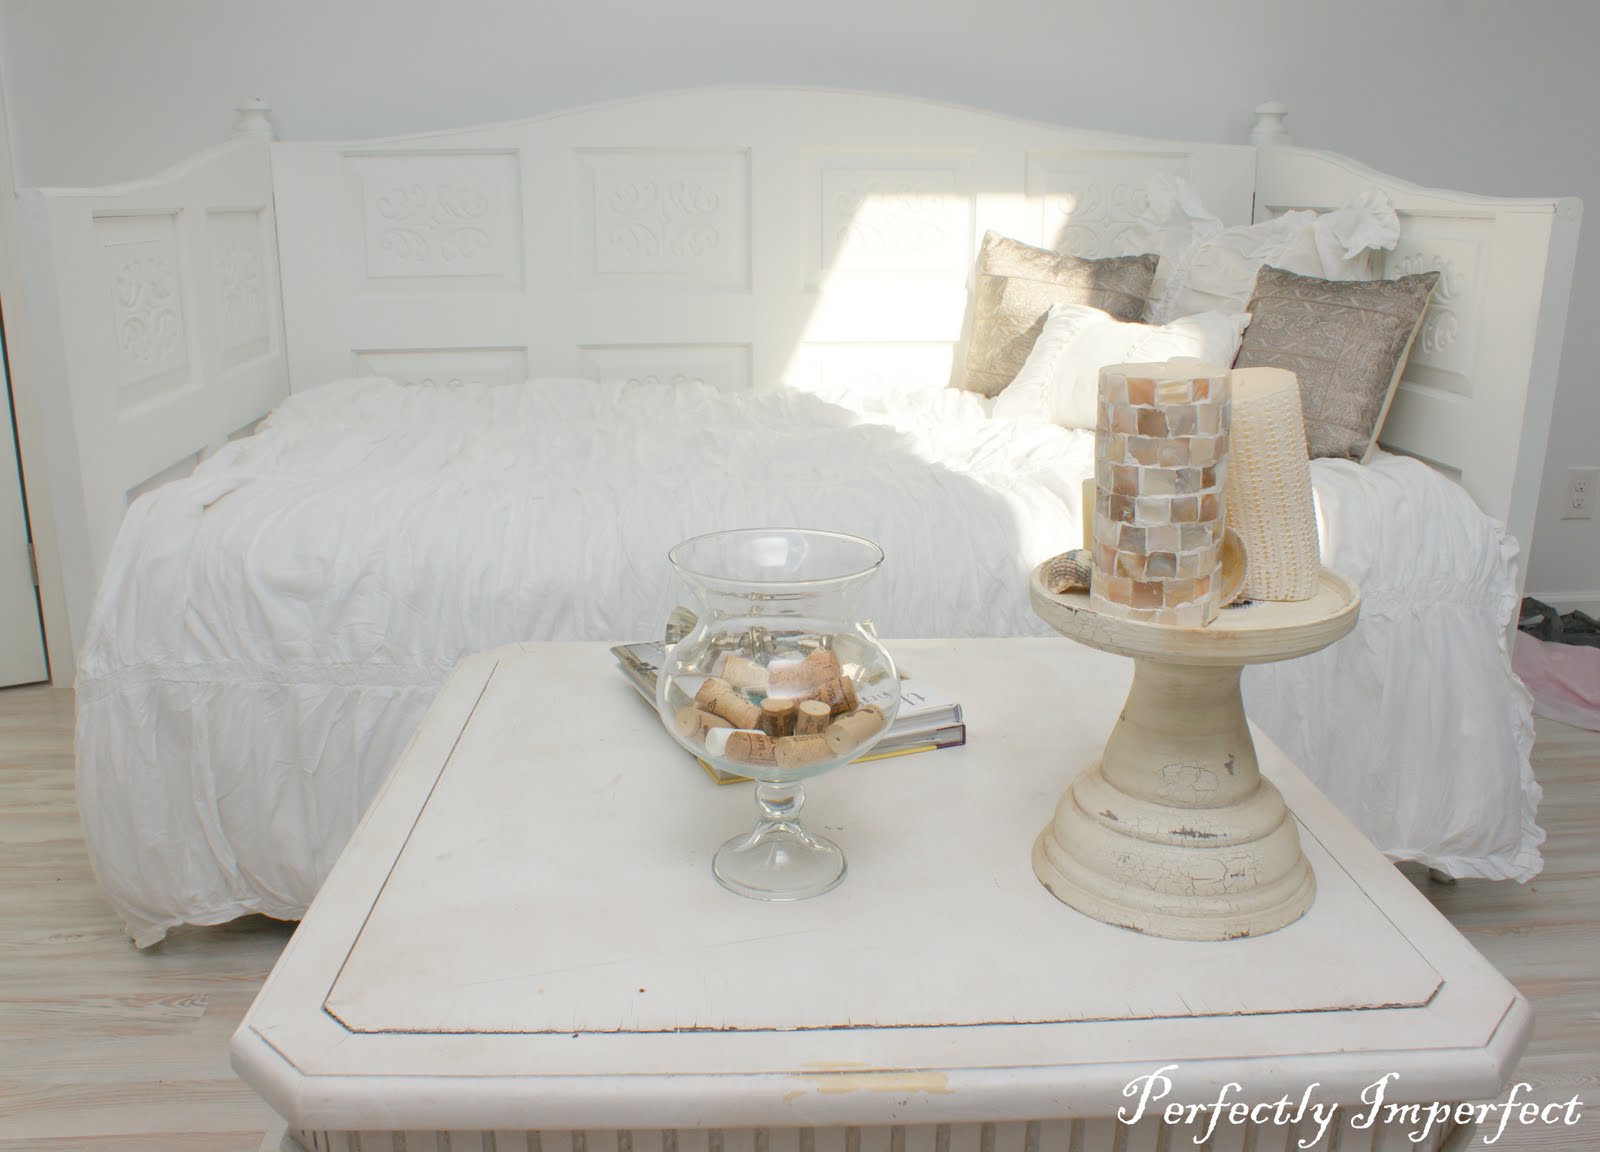
Even though I am torn with the details, I’m a thrilled with the construction and the paint job. Matt, you did a BEAUTIFUL job, and I couldn’t be happier with my $20 daybed! That’s right, I said $20 for the balisters and feet…okay, maybe $30 with paint, but I only use gallons of that per week.
🙂
I promise you a full tutorial soon….and there’s rumor of a video post on the construction.
Can’t wait to hear what you think!!
And on to some news…..
Style Feature Saturday is coming soon! You know I’ve been talking about it forever, and I’m taking the plunge. As long as there are a good bit of participants, it’ll go on for, I don’t know, forever.
Mwa Ha Ha!!!
🙂
All scary laughs aside, this linky party will be for featuring your style–in the home, that is. It could be featuring your new mantel decor, or a room re-do, or even a craft that is for the home….and definitely furniture transformations! Even though I love all the crafts out there, there are so many parties for that and most parties include all categories. There’s some on paint, on furniture, but none that cover the style of our homes….so if you heart me like I heart you guys, spread the word and be on the lookout for the button. It should all be set up within a couple of weeks and I’ll announce the start date—on Saturday’s.
SOOOO excited to spend my week perusing your brilliance!
If you would like to host a giveaway during any Style Feature Saturday, please let me know! See “Advertise” for some stats on the traffic here, and how many eyes would be headed your way.
Can’t wait to hear what you think about the daybed…give Matt some love, will you? Just not too much.
🙂
**linking to some awesome linky parties found in my sidebar or under “friends and inspiration.”**


The bed is stunning! I'm voting for glaze. Maybe do a brownish or tan glaze, to mix it up from the gray on the dresser?
Oh I'm so happy to be the first post to tell you it's absolutely breath taking. The bedding is beautiful, I'm just smitten on the cover and the pillows….couldn't be more fitting…and to think this was once old doors…just perfect!
I as well think that bed is more beautiful a bed than I’ve seen!!!! I have to have it, and cant wait for the tutorial!!! Getting my father to help with the construction is another thing but Im determined to have this daybed soooo I will find a way!!! Im holding my breath waiting on the instructions!! Great Job!!!
OMGoodness! Shaunna! I seriously gasped when I saw the first after picture, I couldn't even read anymore…this is gorgeous! You are amazing! wow! K…I'm going to go finish reading the rest now 🙂 Just Simply Beautiful!!!!!!
This is totally amazing!!!!!! Love the bed! Love the whole room!
shaunna,
Shaunna it is absolutely gorgeous! Matt did a fabulous job! Great idea mom! My vote is for glaze. Love the linens and pillows.
What's NOT to love about the entire room! Great job on the daybed. Those doors were gorgeous to start with!
This looks BEAUTIFUL! What a great job! 🙂
Great daybed. I would love to join your link party, can't wait for it to start.
Wow I love how that turned out! What a great idea!!!
Love it! My hubby was WAAAAAAAAY impressed with the door to bed conversion.
Shaunna, this is GORGEOUS! I love your photos too as usual. Did you use an oil based or water based primer? I find that oil based primers will give way better coverage for bleeding and once dry you can still paint over them with an acrylic top coat. As for finishing it, I really don't know. I love distressing and glazes. It's such a beautiful piece I'm sure it will look great regardless!
This is just awesome and especially using doors from your childhood♥ I'd do a light glazing if possible, it's fantastic either way!
really, i mean what can i say? i just picked my jaw up off the floor- stunning! i want that in my house!!!!
oh my goodness!! this is absolutely beautiful! i am so super excited to see how you did this…i wanna make one!!
So FAbulous!
It turned out fabulous! I'm not surprised, you are amazing.
Love, love, love it! That's the coolest looking daybed ever! The details are awesome. Matt did a great job and I can't wait to see the tute!
The daybed is fabulous! I do a lot of this stuff myself and I am really impressed with the trim work he did around the edges. If it were me, I'd glaze that sucker. Lisa~
Oh how I adore that daybed! I have been wanting one just like this for a while now! I love it!!
It is beautiful and I am so impressed with Matt!! You know how I love a good story behind a piece! You were so brave to cut them and I had no idea Matt was such the carpenter. You two are a perfect pair! Ava will LOVE having that special piece when she gets older (if you let her have it!).
Wow… I mean what else can I say that hasn't already been said?! It is amazing, romantic, lovely and perfect the way it is!
Oh my goodness, it's gorgeous! I'd love to learn how to put together new furniture from old stuff.
Really beautiful! What a great transformation! Thanks for sharing the how-to… Theresa
It is quite possible the most stunning daybed I have ever come upon. It is perfect in every way, however the glaze sounds fabulous also. I am in love…thanks for such cool inspiration on this stiffling hot summer day.
One of the most impressive DIY projects I've seen yet. Absolutely GORGEOUS and so original!!!!
That bed is AMAZING! Seriously, wow. Well done!
I love this project , it is amazing , you should be so proud of it , I am sure you are.
I love it. It is just gorgeous. I have grand ideas like that all the time but mine never come to fruition. Good for you.
What a gorgeous creation! I would have been scared to cut those doors too. It turned out beautifully though.
I am totally blown away by how beautiful that bed is! And it looks so good in your room! You seem to be such a beautiful and inspiring young woman, but even more you seem to be married to a talented, loving, caring, hard working, and dare I say, devilishly handsome man! Who looks quite the stylish dresser from what I can tell in the video's You really are blessed to have found someone quite like him… I hope you tell him everyday and every night! God has truly blessed both of you!
This is really such a fantastic piece! And what's better is its meaning to you. You should be very proud! This is sure to become a family heirloom. You should write its history and staple it to the bottom of the bed so the next person in the family to own it will know…
Wow! i need a Matt in my life that can help construct like that. My brother that can is too far in Alaska. But that daybed is absolutely gorgeous. this just got filed away under my decorating my "pretend dream house" files. haha
Amazing. Really amazing! I admit I hesitated to get excited when I saw the doors red. But oh my goodness the detail is to die for in white!
This looks so lovely and relaxing. Great job!
The bed is to die for. Great job. I would vote for some light glazing to tone down some of the white and let the details show. The whole setting is lovely. Did you make the pillows?
I love the bed. Your blog is great! So inspiring.
OMG! That is beautiful! I have an old crummy metal daybed, I'd love to do this with it!!
Wowww… this is a really beautiful bed! From what I can see, I am quite in love with this room, especially the fact that everything is white. It gives it such an angelic affect, and the accents in the door really help. Quite lovely! http://yourworkistodiscoveryourworld.blogspot.com/
oh my gosh…this is just unbelievable! It looks JUST LIKE a bed that I tore out of country living YEARS ago as a little inspiration picture!
What a gorgeous bed you created. I admire people with vision and know how. Do you belong to blogfrog? I'm thinking I've seen you there. Anyways, I'm from Kat's Almost Purrfect World.
can't wait for the tutorial so that i can use up some of the doors lurking in my garage! beautiful work!!
I absolutely love this idea! It's pure genius. I may have to try this, if the door and occasion ever fit! Thanks for sharing, Marcia
Great project! We are going to feature it today! Nice job!
Okay, you probably don't need yet another lurker to stop by and tell you how flippin' fabulous this daybed is, but I figure – I love comments, so you might, too. Let me just tell you. My heart leapt. Leapt I say. Like seriously, I sort of felt a tad faint. There are no words. I just love it. Wow.
this is so perfect. I can't wait to see a tutorial, I'd love to do something like this for my daughters first real bed.
simply amazing!!! Can't wait for the tutorial…I've been on the hunt for a daybed for the backyard patio and your project is awesome. This is the best remodel I've seen…ever!!!
i had to share this with our readers at peppertowne too!
I like the door better as a daybed. You did a fantastic job! It is gorgeous
I love it! What a bee-you-tee-ful job! Can't wait to see how you finish it up!
I have to say that I'm sure you can make it look even nicer but I think it looks great just how it is now, beautiful!
I'm in love with it as is. What a gorgeous redo!
It looks fabulous! What a great idea, and a great way to preserve your childhood memories!
http://www.prettyhandygirl.com
What a wonderful idea! Beautiful Job! You & your Mother make a Great Team! Amazing! I hope you don’t mind, but I’m going to pin this on a DIY board I curate at Pinterest!
I think it's amazing!!! I love every bit of it!!!
That bed is gorgeous. How smart of your mom to save the doors. I think I would just lightly sand by hand to let a little red show through…along the edges and on the high points in the design. But I'm sure that whatever you do will be beautiful. Great project. Thanks for sharing. Can't wait to see the finished project.
What an amazing bed! And how very great that it has a connection to your family.
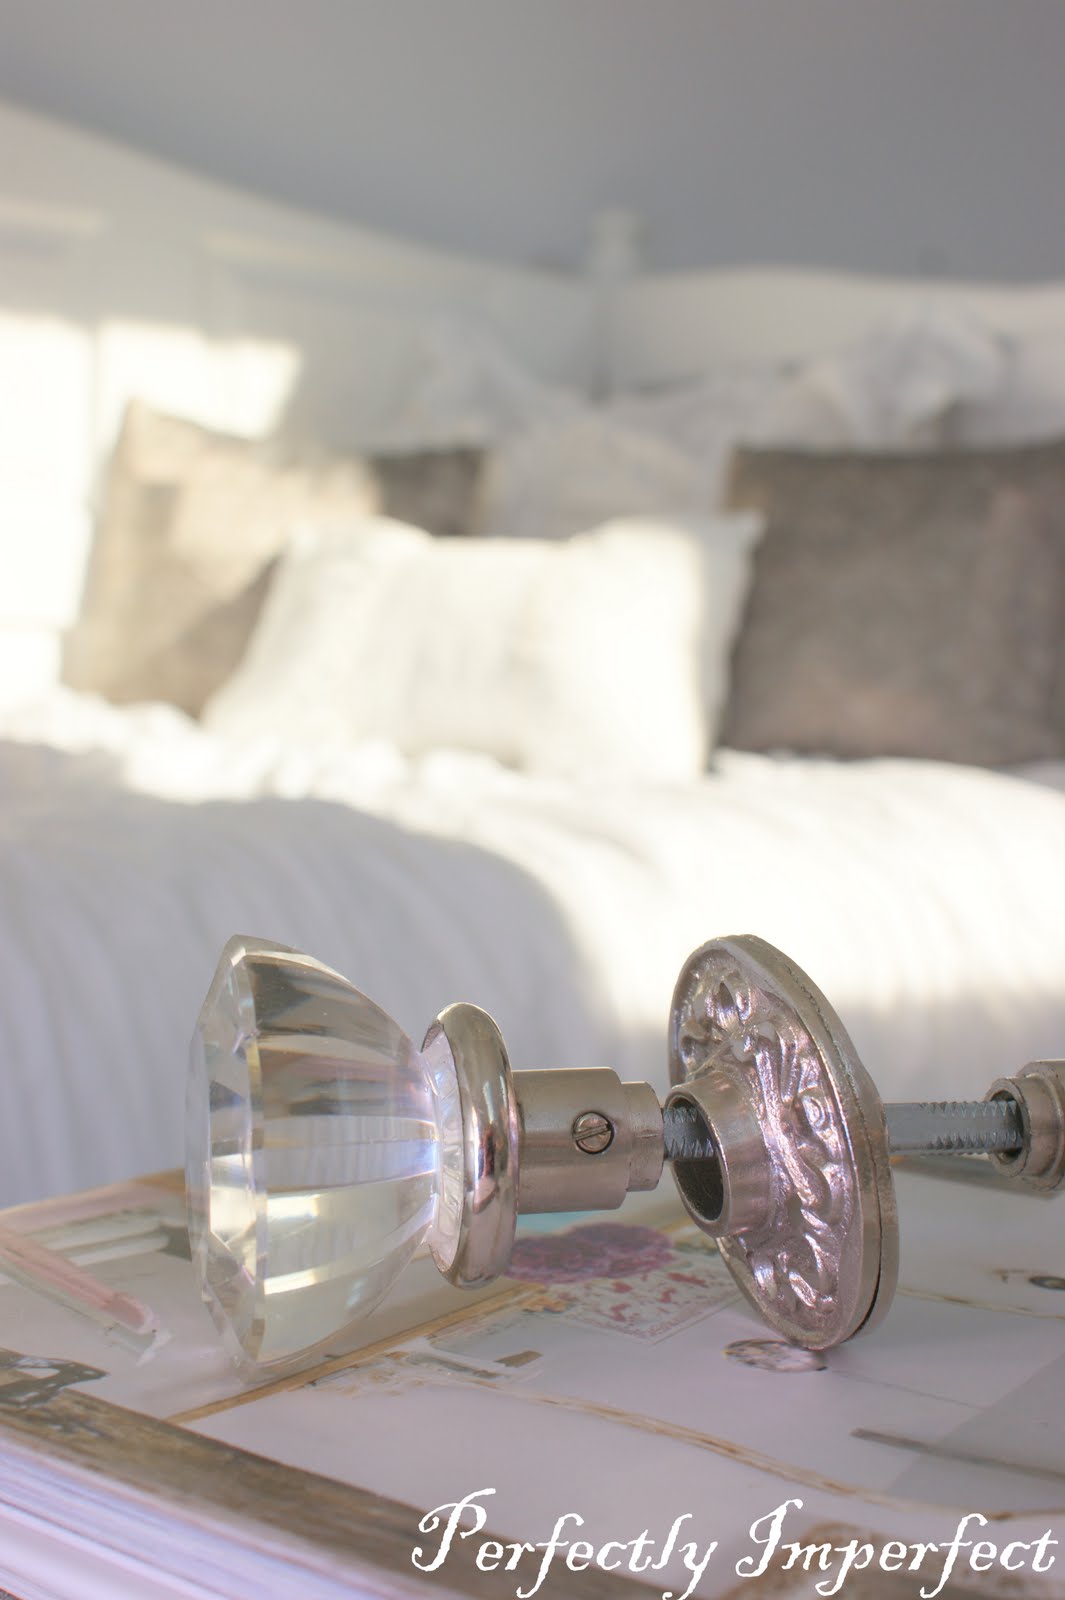
Oh. My. Gosh. I am in love! You are so creative. Beautiful vision. We share a love of white spaces. Great photography, too. I'm loving your crystal/glass door knob photo with the sun kissing the bed in the background. I'm following you know & "like" you on FB. I'd love it if you stopped by sometime.
Oh my goodness! I am IN LOVE! What a wonderful day bed and I love the history behind it! This one is going in the file for "must do's"
In one word: Amazing!!! What a vision to turn those doors into a daybed. It truly looks wonderful. And I so envy that bedding, but I guess that wouldn't work with Euro bed sizes.
Have I told you lately that I love your DIY style? This is gorgeous! Thanks so much for sharing in the DIY Project Parade…I always LOVE seeing your creativity!
I think those are the most beautiful doors I have ever seen! And how fabulous that you were able to reuse something from your childhood, seriously remarkable!
I made a bed out of two doors for the headboard and footboard but I never thought to make it into a day bed. GENIUS.
After spending MONTHS looking for a daybed/trundle for my 2 girls, I think I'm gonna go with this. I see doors all the time on Craigslist that I'd like to buy, but have NO clue what to do with. This just hit the nail on the head…. board, LOL.
It's absolutely gorgeous!!
how can I be sure not to miss the tutorial on making this beautiful daybed from doors…I’m especially curious about the trampoline like platform for the mattress (if that is what it is)…please tell me how I can get on your mailing list so I will receive the instructions when you send them out. Thank you so much. We need a daybed desperately and cannot afford the price of ANY we’ve seen anywhere…this seems very doable and very lovely. Thanks so much for sharing the idea and I can hardly wait until you share the details! You are a creative genius and glad I stumbled on your site while googling “daybeds”
Hey Barb,
Here it is….hope it helps! (the middle piece was the box spring we pulled from an old daybed we used as a template)…hope you have good luck!! So neat to have met you!
🙂
shaunna
https://www.perfectlyimperfectblog.com/2010/07/how-doors-became-our-daybed.html
I want to say how very professional it looks. Such a piece would be so expensive to buy and I’m sure it’s better than what you saw on Ebay. Looks so comfortable too. Tremendous!!! I hope you rewarded yourselves with a nice treat afterwards.
WOW!
please send instructions of how to do this — or perhaps they’re listed somewhere on the net? i have long been a fan of daybeds and have one i paid $50 for some years back from a nearly centenarian widow. that was a bargain, and i hated spending $100 for a new chic cover, but i did. looks great.
i’m actually thinking of one day replacing the bed my dearly departed husband built for us with something just for me. this would be totally awesome. thank you again.
Hey there! Thanks so much! Our tutorial is already posted here: https://www.perfectlyimperfectblog.com/2010/07/how-doors-became-our-daybed.html. Hope that helps!!
🙂
shaunna