
Happy 4th of July! I’m going to be taking off the rest of the weekend to enjoy time with the family here at the beach, and I hope you and yours have an amazing weekend. A quick furniture before & after for you today…
While I don’t paint as much furniture as I used to, I still get in the shop from time to time to pull off a quick makeover.
I don’t have a true before of this huge hutch. It’s actually a Restoration Hardware entertainment unit. I know, you’re probably thinking why in the world would we paint it. Its original black finish was chipped and tired, and it needed a fresh coat of paint. We painted in fun colors at first, and since it sat a while, I decided it was time to go neutral.
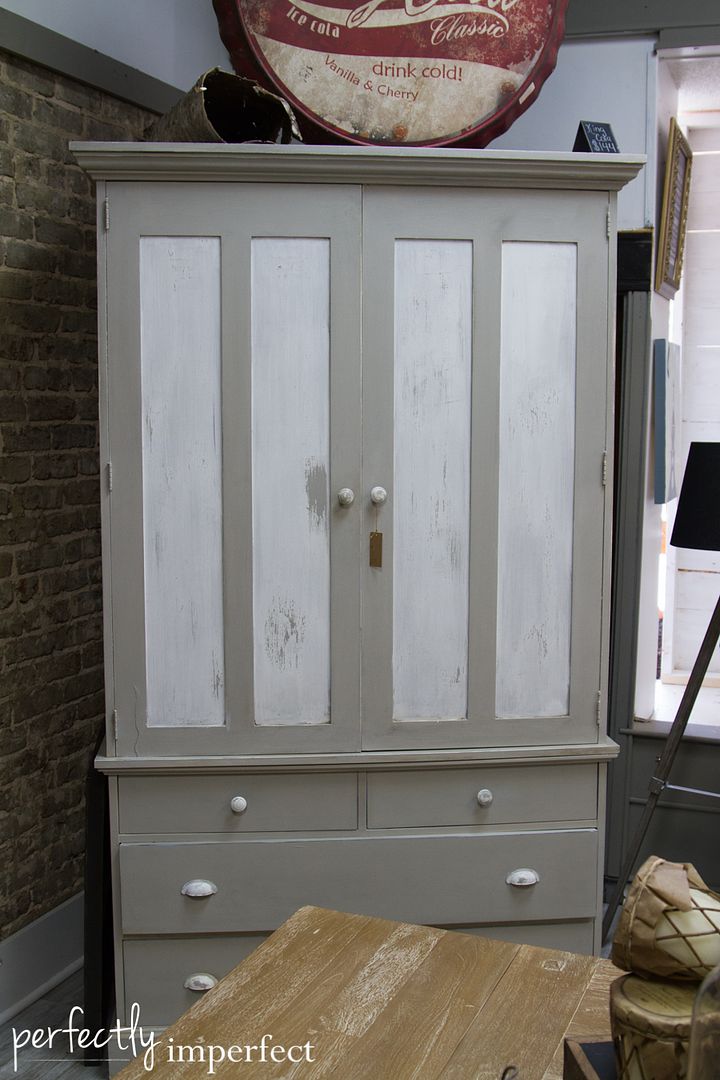
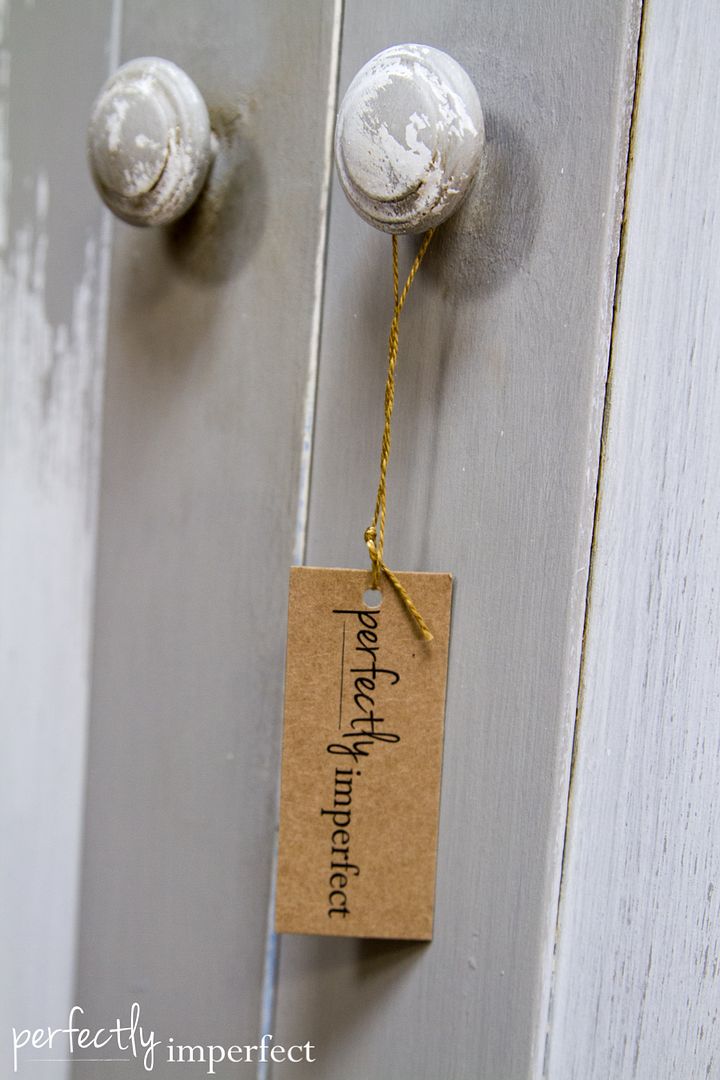
Here it is now. Fluorescent lights and all. I almost didn’t post the photos because I snapped them in the five minutes I had, and didn’t have a tripod or turn the bright lights off. But hey, sometimes, it is what it is, and I love the cabinet anyway.
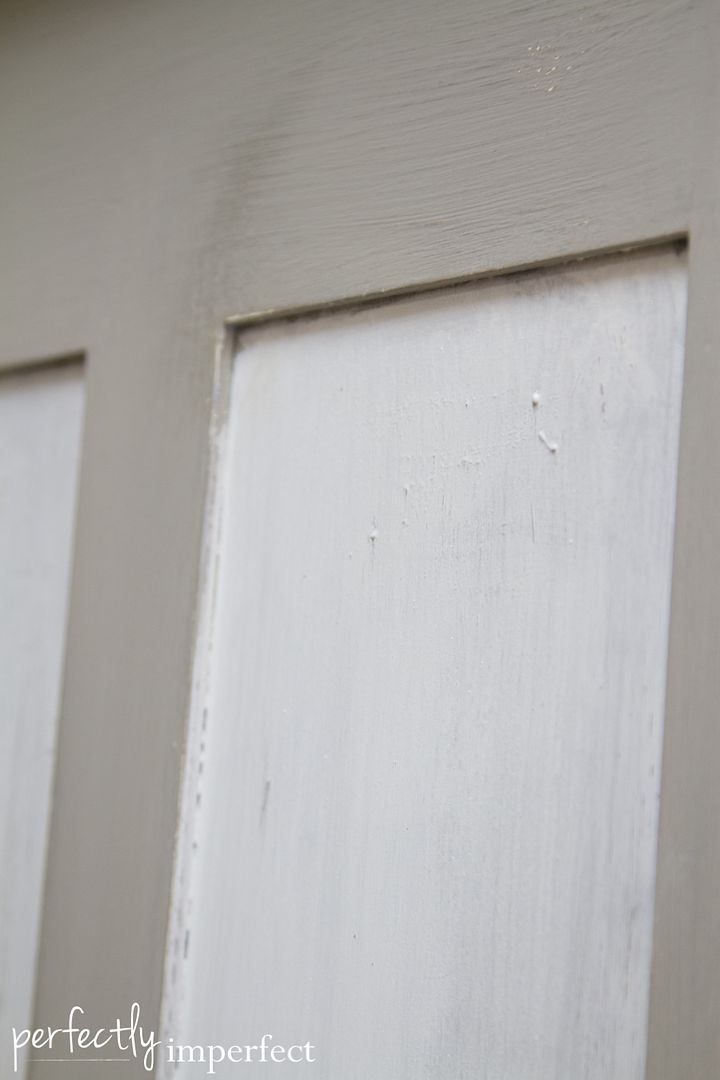
I painted the base coat in a mix of half French Linen and half Pure White (this is one of my favorite neutral colors ever). I painted two coats, allowing dry time in between.

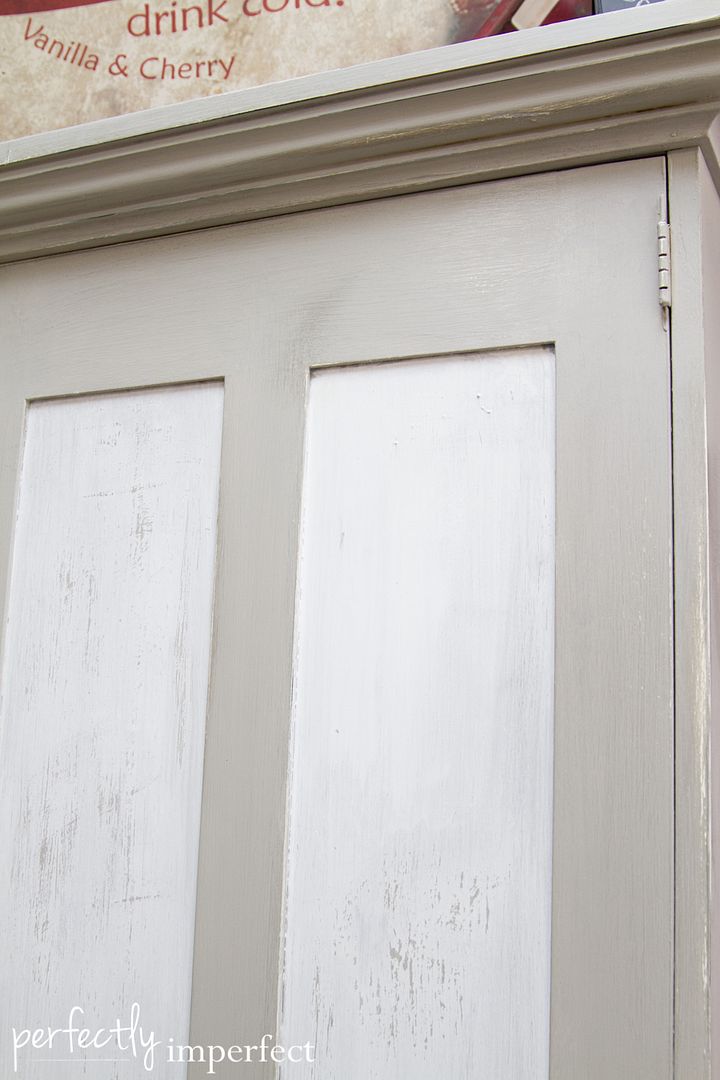
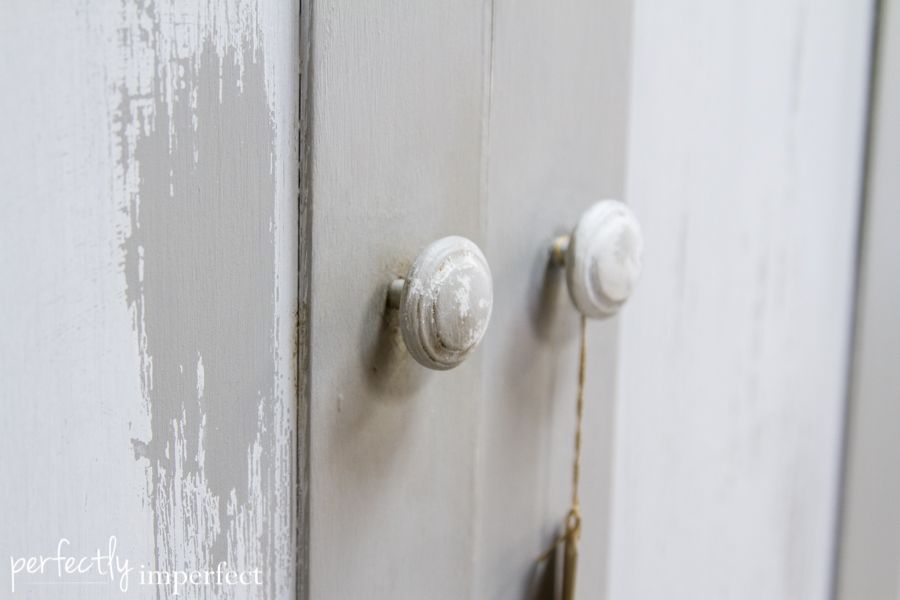
I then painted the insets and hardware with Miss Mustard Seed Milk Paint in Ironstone. So the paint would “resist” I used Hemp Oil. You can simply swipe hemp oil here and there along your piece and the top coat will peel back a bit. If it doesn’t, don’t worry. You can hit that spot with a fine sanding block and the paint will distress much easier.
As I was painting this piece, I was having a conversation with Kristy and she was asking about some of my process, and the what I think about when painting furniture. One philosophy I don’t think I’ll ever change: Dark wax or antiquing wax is made for toning and aging a piece, not for coloring a piece.
Meaning people should have to look closely to know exactly how you painted that dresser or chair. You want them to be drawn to the furniture, not the coloring or treatment.

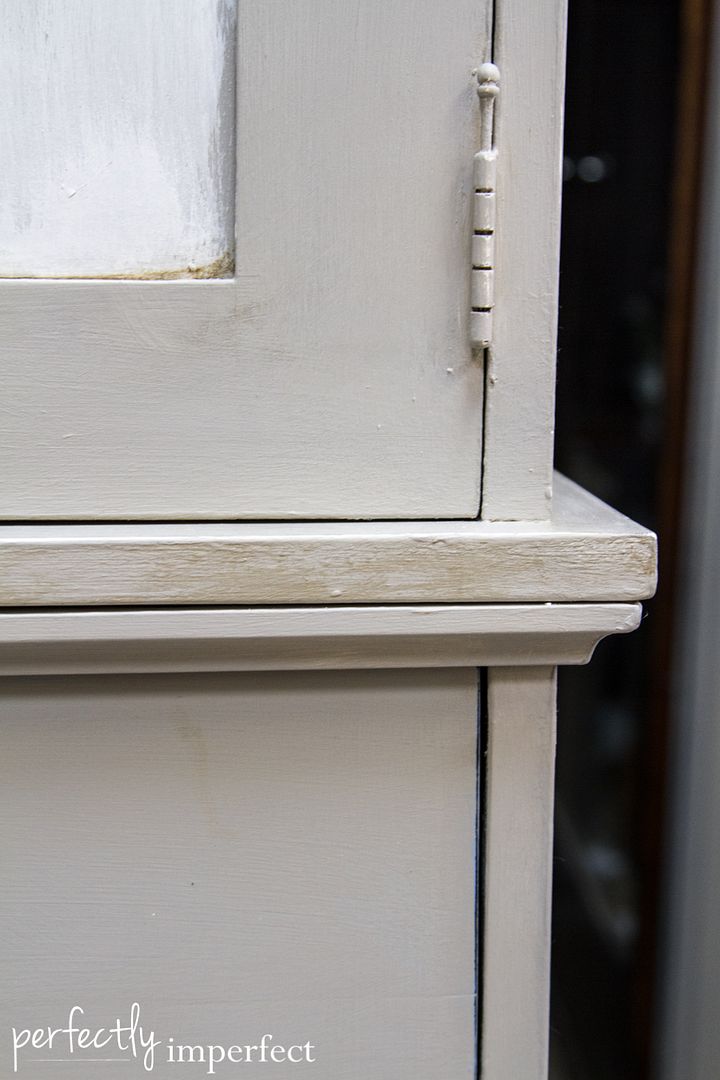
When I use dark wax, like I did on this piece, I want it to blend into the paint, not stick out in streaks and clumps. For this piece, I decided I didn’t want to tone the entire piece but only age the corners, hardware, and grooves where dirt would naturally appear.
Some tips on using Dark Wax–
- Work in sections. Apply clear wax to the side of a dresser, etc. Follow up immediately with dark wax.
- Mix Dark Wax with Clear Wax to create a less saturated pigment. It makes the dark much more workable.
- Have a dark wax only cloth. Keep it close by to wipe the dark wax up quickly.
- Got too much dark wax on your piece? If you have that layer of clear wax on the underneath, then you can literally erase the dark by adding more clear back.
- Buff as you go. After applying your dark wax, keep a lint-free cloth nearby to buff in a circular motion as you go.
- The grooves and lips of the furniture are where dirt would collect anyway. Leave dark wax to pile in the corners, on the handles, or in the edges of paneling.
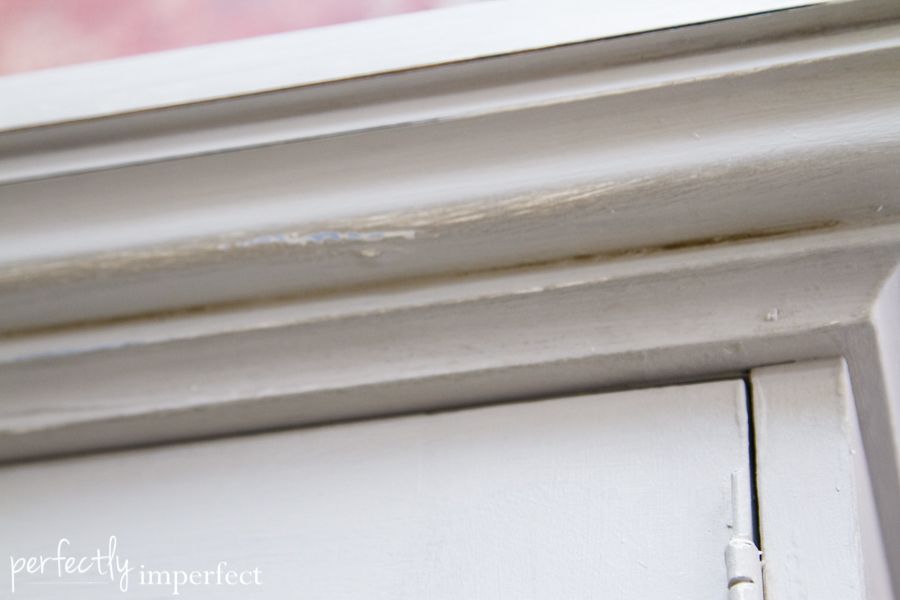
In this picture above, you can really see how I used the dark wax to settle in the corners, and also tone the front edge of the piece, where I imagine it would get a lot of use and age naturally.
I also added dark wax to the handles, too. They’re touched and pulled and will most definitely wear with age, so it’s a natural spot for some dark wax. I’m going to work on a video for this hemp oil/dark wax technique, but in the meantime, feel free to ask any questions in the comments!
Products I used for this makeover:
Miss Mustard Seed Milk Paint in Ironstone
Better Than Cheesecloth Waxing Rags (p.s. they’re washable!)
Annie Sloan Medium Paint Brush
Fine/Medium Sanding Block


What ratio do you use with the French linen and pure white?
Half & Half, Sherry! 🙂
Turned out great! I really enjoyed our conversation about the piece as we worked together that day. It’s always interesting to see a person’s process as they create. It is a personal reflection. 🙂
Hi Shaunna,
I’m a recent subscriber to your blog–I love your style and all the tutorials you have! I’m also very much a newbie with using decorative paints and waxes but I am trying. On the day you posted about using dark waxes, I was actually working on a piece with dark wax so I really appreciated all the good advice you had. I do have a question–probably a silly one. I don’t have a wax brush and just use rags for applying the wax. What do you do with all those rags?! I have a feeling I used way too much wax by the amount of rags it took to get through the piece I was working on. Is it best to throw them away or can they be soaked in some kind of solvent and then washed? Don’t know if it makes a difference but I was using Briwax and Johnson’s paste wax. I look forward to getting better at this and will definitely check out more of your tutorials. Thanks for a great blog!
Love the color transformation! I’m sure it will sell this time around!
Absolutely stunning! I love the colors and the mix of paints and products. I look forward to your video 🙂
Thank you for sharing this post with us, just loving color mixing.
Can u tell me what dark and clear wax u like the best ? And where u get them ? I’m in Pa close to Pittsburgh and do I have to seal it with anything after the wax I haven’t I use annies wax I love the way it looks just don’t like the smell
Aweѕоme post.
I have really old — almost ancient — bookshelves. Because they are so old, the quality of wood is outstanding, but the paint — not so much. I’ve been thinking for a while to do something similar with that but I don’t have much experience. I only painted walls, ceiling and doors in my house but never worked with wood or any other “objects”. I think I might try this very soon. Thanks for tips!