
It’s been quite a couple of weeks. I’ve been a little quiet here, and hopefully things are settling back into routine. Our business is changing and shifting, and we are with it. We are excited to continue all the ventures we’ve begun these last couple of years, but it’s also fun and refreshing to reevaluate, to try new things, to dream a little bit more.
In the meantime, I wanted to share a quick and fun little project I did for Ava’s Frozen party.
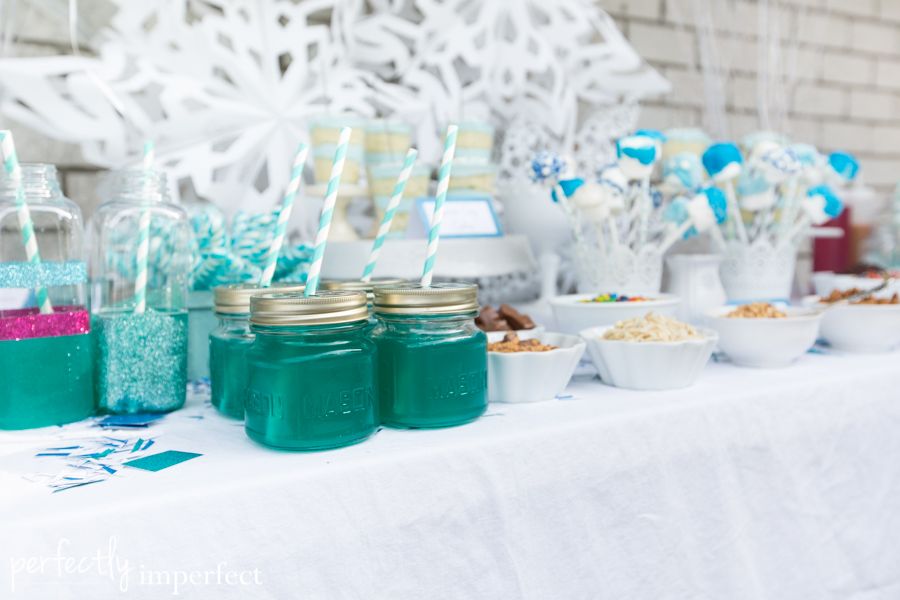
I feel almost silly posting this tutorial, but honestly, it was one of the fun things that made this day special for our girl. And it couldn’t have been any easier or more inexpensive.

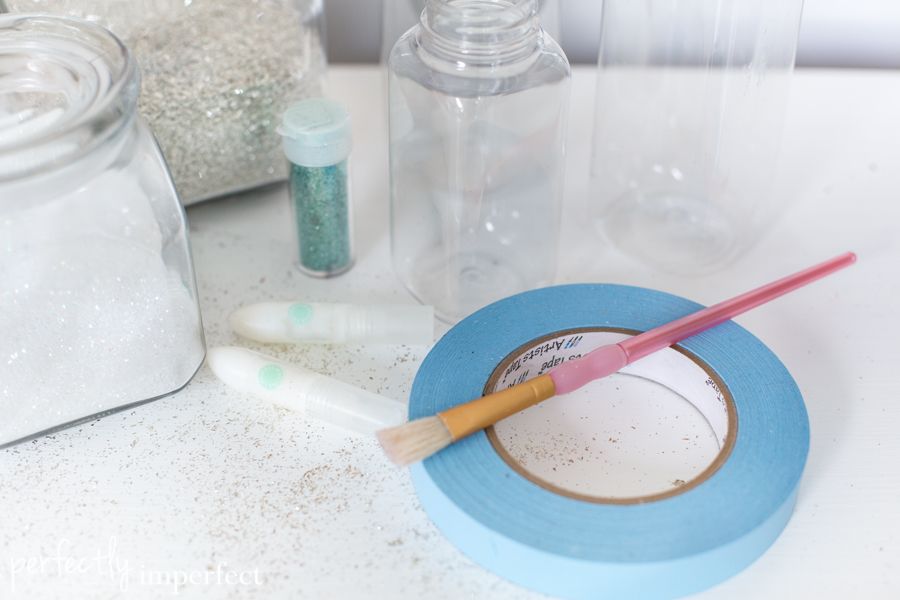
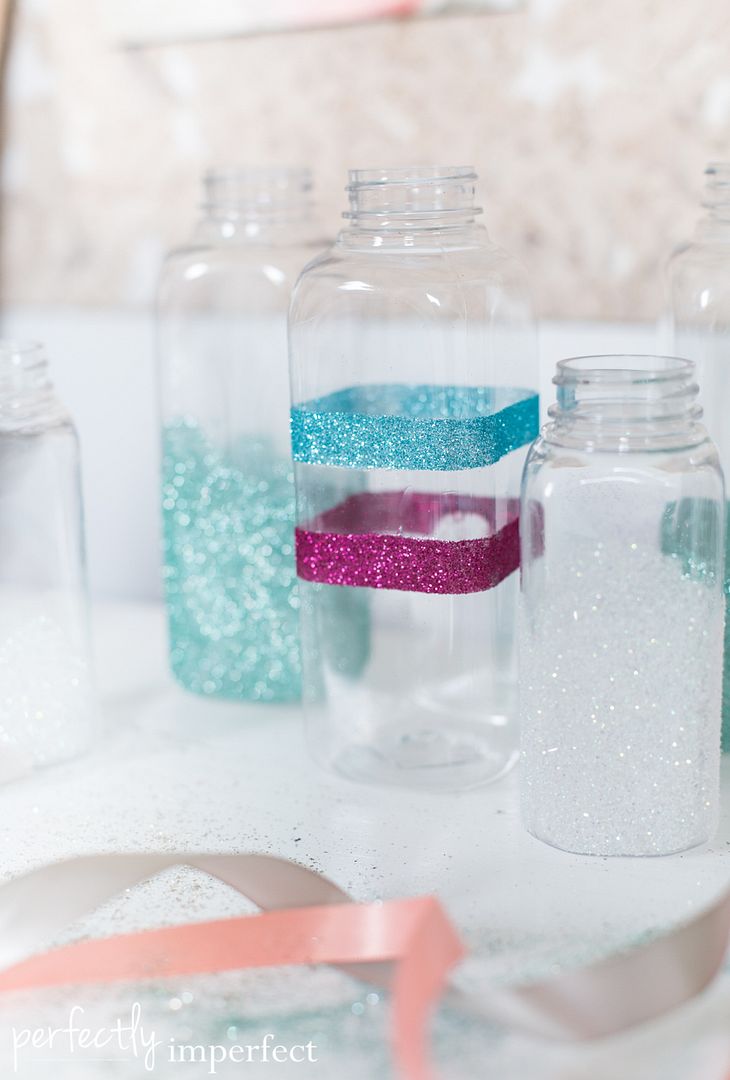
To make these simple glittered bottles, you’ll just need a few supplies.
Plastic Milk Bottles (I don’t know where mine came from 6 parties ago, but here are some others)
painter’s or artist tape
fine glitter (I use Miss Mustard Seed German Glass Glitter & Martha Stewart fine glitters)
Elmer’s Glue or other craft glue
Small Craft Brush
sheet of paper to work on
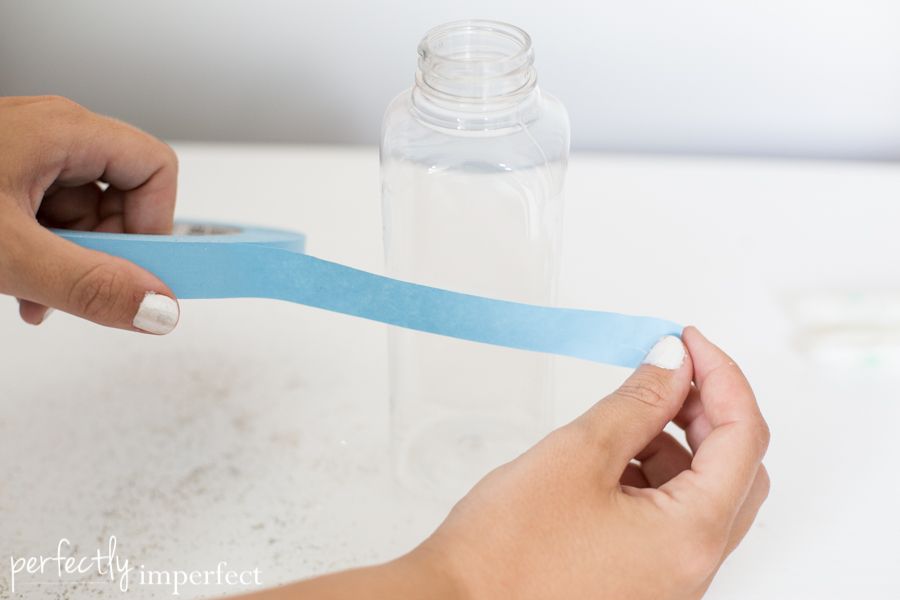
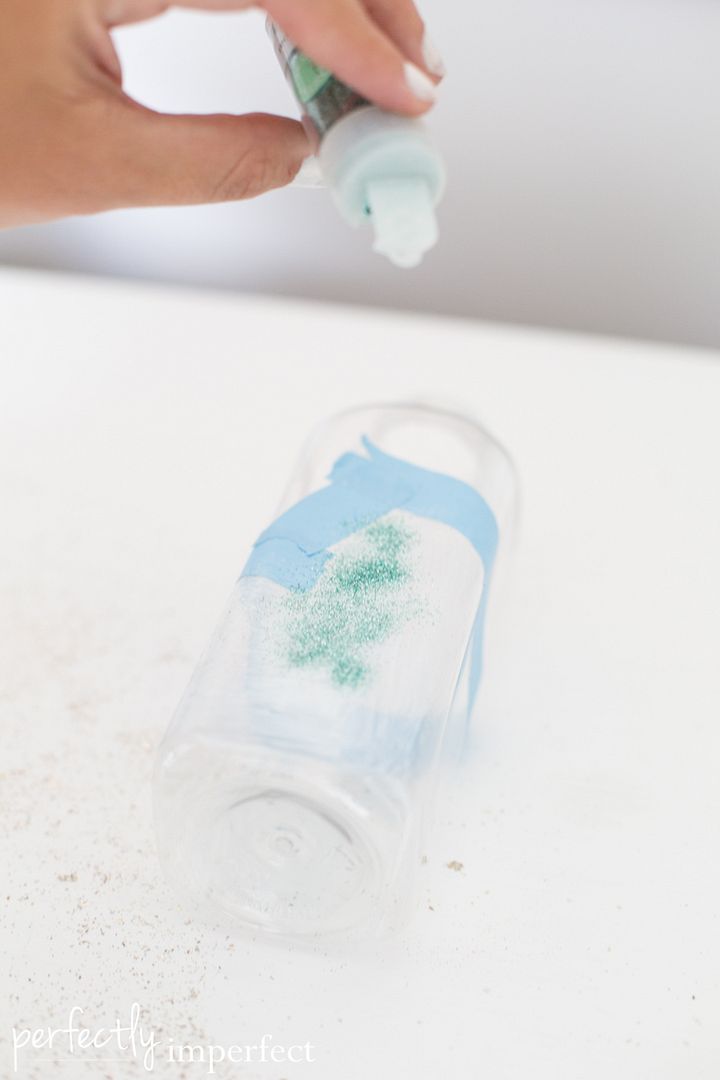
1. Using painter’s tape, tape off “mountains” along the side of your milk bottles. I varied the heights and peaks so it looked like snowy mountaintops around the bottle. We also made a few with multi-color stripes.
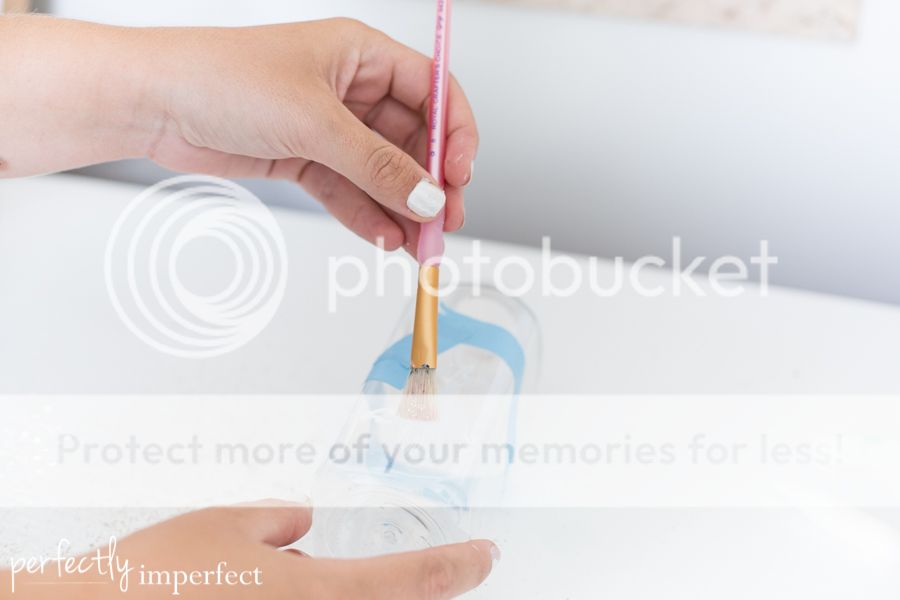
2. After your tape is secured, paint a thin coat of glue on the bottle under your tape line.
3. Work in sections: glue a side, glitter that side. Tap the glitter to completely cover the bottle. Don’t be stingy; we’ll save the glitter later.
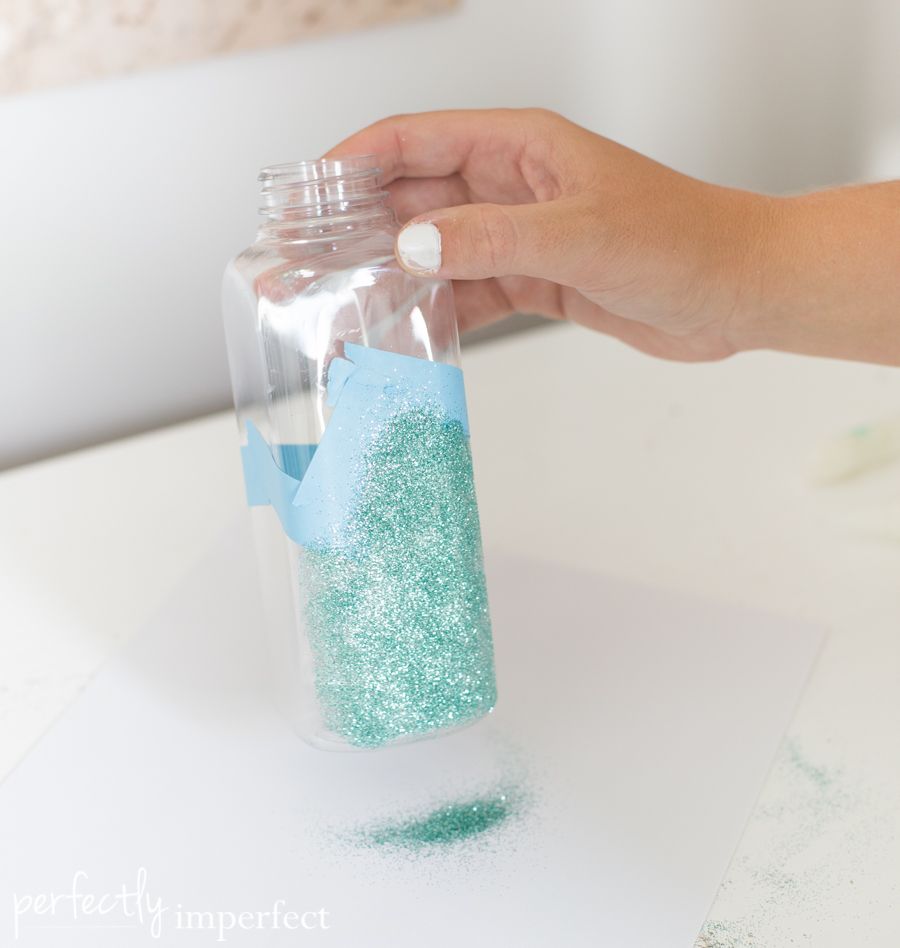
4. Tap off excess glitter onto a sheet of paper so you can save it for later (yes, super thrifty here).
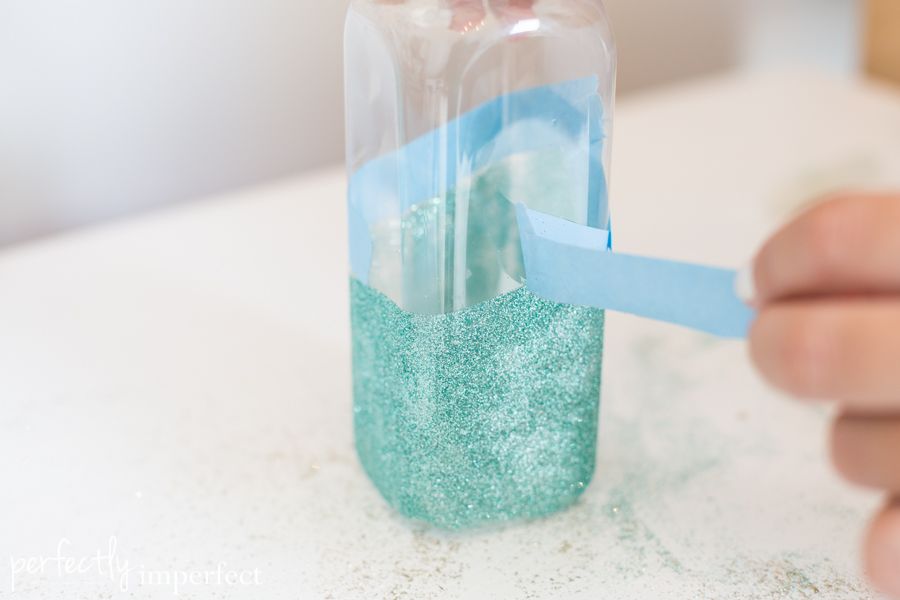
5. Carefully remove your tape and voila!
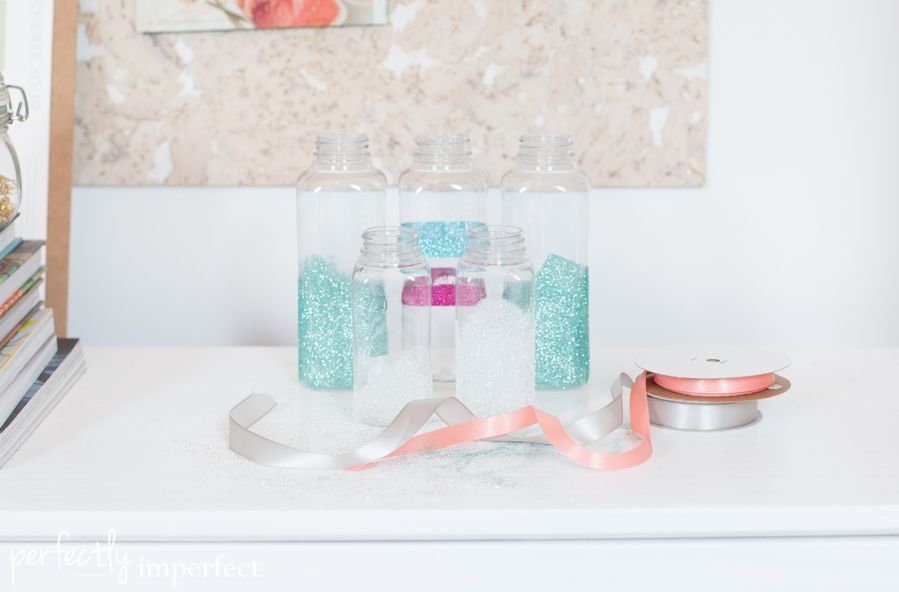
These bottles were tossed after our party, but they’ve served me for at least 6 birthday parties, so I didn’t mind glittering them up and recycling. But you could always re-glitter them to freshen them up after an event.
And remember, as always, they don’t have to be perfect. Some of our sides looked beautiful and some kind of wonky. The kids loved their glittered punch bottles, and that’s all that matters.


Whenn I initially comented I clicked the “Notify me when new comments are added” checkbox and now
each tije a comment is added I get three emails with the same comment.
Is there any way you can remove me from that service?
Many thanks!
Hey there,
I’m not sure that there is…sorry about that! 🙂
Thanks , I’ve recently been looking for information about this topic for a while and yours is the greatest
I have discovered so far. However, what about the conclusion?Are you positive about
the supply?