
First, our winner of the The Crisp Interiors $50 Gift Certificate….
Jody from Growing With the Gimlins
Send me an email at shaunna@harristire.com in the next 48 hours and we’ll get you your certificate!
Welcome to our first installment in the new series, Designer Finishes. Over the weekend I tackled the Byholma Collection from Ikea. Now, don’t get me wrong, this series is not to take away from the awesome talent of the designers that work so hard to create beauty, but to celebrate them. And let’s be honest: I’m not going to put Ikea out of business.
🙂
Okay, let’s get started. I wanted to start with an easy-breezy one to build my own confidence, but to also give you something you can replicate in a couple of hours.
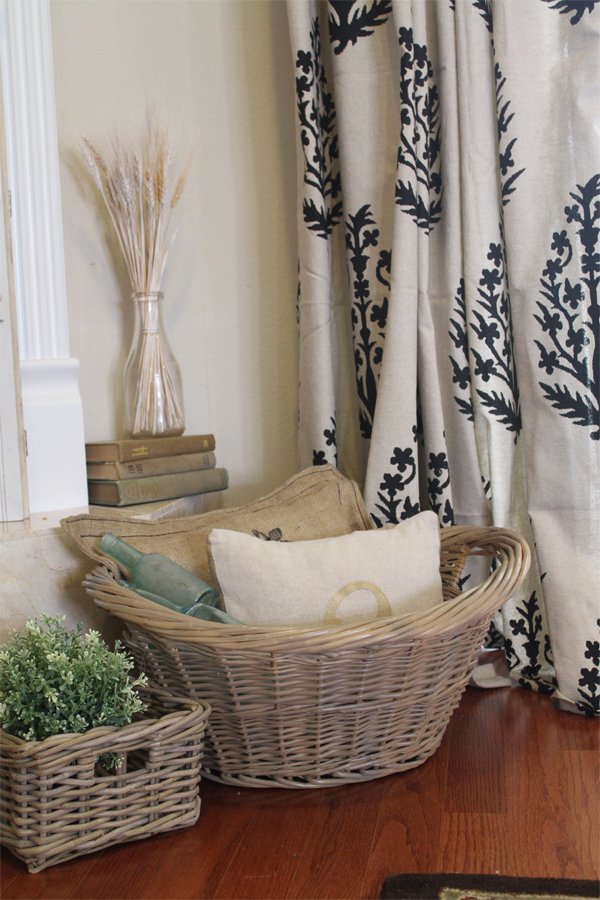
 Here’s the Byholma Collection finish. A beautiful smoky gray/taupe. LOVE it…and for the record, the byholma baskets are so very affordable.

I just already had this guy lying around, and I had to do something with it. No reason to waste a perfectly good basket, right?

Just from looking at the finish of my byholma basket, I knew I would have to use more than one color. And…no stains. The brown/taupe was very cool….no honey, oak, or walnut would have worked. Even a tintable stain would have been tricky. Anytime you are working with a raw surface, just remember to go with spray paint if you need a sheer-er finish.
I chose Krylon’s Khaki and Classic Gray (which is the lightest gray available at our local store). They were both in a Gloss, but if they had been available, I would have chosen a Satin finish.
My plan was to layer the khaki on first, and cool it just a bit with the gray.

Here you can see a shadow. That shadow is the first sheer application of the khaki. You’ll want to hold your can at least 10-12 inches away so it mists onto your basket…not covers.

I actually did that on the whole basket and picked a couple of spots to put more solid coats on. I painted two sheer coats on back to back.

Apply your gray on in the same sheer application after your base coat dries. Be very careful as you spray…you don’t want a big, solid spot, because it will be just dark enough to turn totally gray. We are going for a combination of the two.
And that’s it!

There it is down there right beside my Byholma basket.

Here you can see the variation in color…and the trash on the floor.


Again, if I could have used a Satin finish, I would have. It really didn’t bother me once the entire basket was finished. As long as the application is sheer, you probably won’t notice the sheen too much.

I know we started simple, but I really am glad not to have a plain wicker basket and that it was so easy to replicate a favorite finish of mine.
What do you want to see next? I’ve gotten a handful of requests…let’s hear it. Any finish you want me to match…I’m gonna give as many as I can a whirl.
🙂


Love your baskets – sometimes the simpliest things make the biggest difference!
Wow, it really did make a difference. Love it! Thanks for the tips!
Thank you! I need simple!
Turned out wonderful!
You can always go over it with a satin clear finish to get rid of the sheen, I’ve done that when the colour you want is only available in gloss.
The basket turned out wonderful and I am looking forward to your other projects.
I have the same basket. I might try this to spruce up the basket.
Thanks, Valencia! Let me know if you try it…love to see it.
🙂
shaunna
This is EXACTLY what I’ve been mulling over for a couple of months but didn’t know where to start. Thank you!
Very good blog post. I certainly love this website.
Keep it up!