
First, let me say two things:
One, my computer is going to a new place of crazy and i’ve literally been trying to upload pictures to blogger all morning long!
Second: let me say that our house is turning into a flea market as we wait to get in our addition….there’s theater seating in the living room (creating somewhat of a circular seating arrangement), an elliptical, desk, and dresser in the entry….all that to say: These after shots are not my norm. There’s lots of background stuff, but I hope you appreciate them all the same! 🙂
She had a LOT of problems that don’t even show up in the before shots, but on to that in a minute.
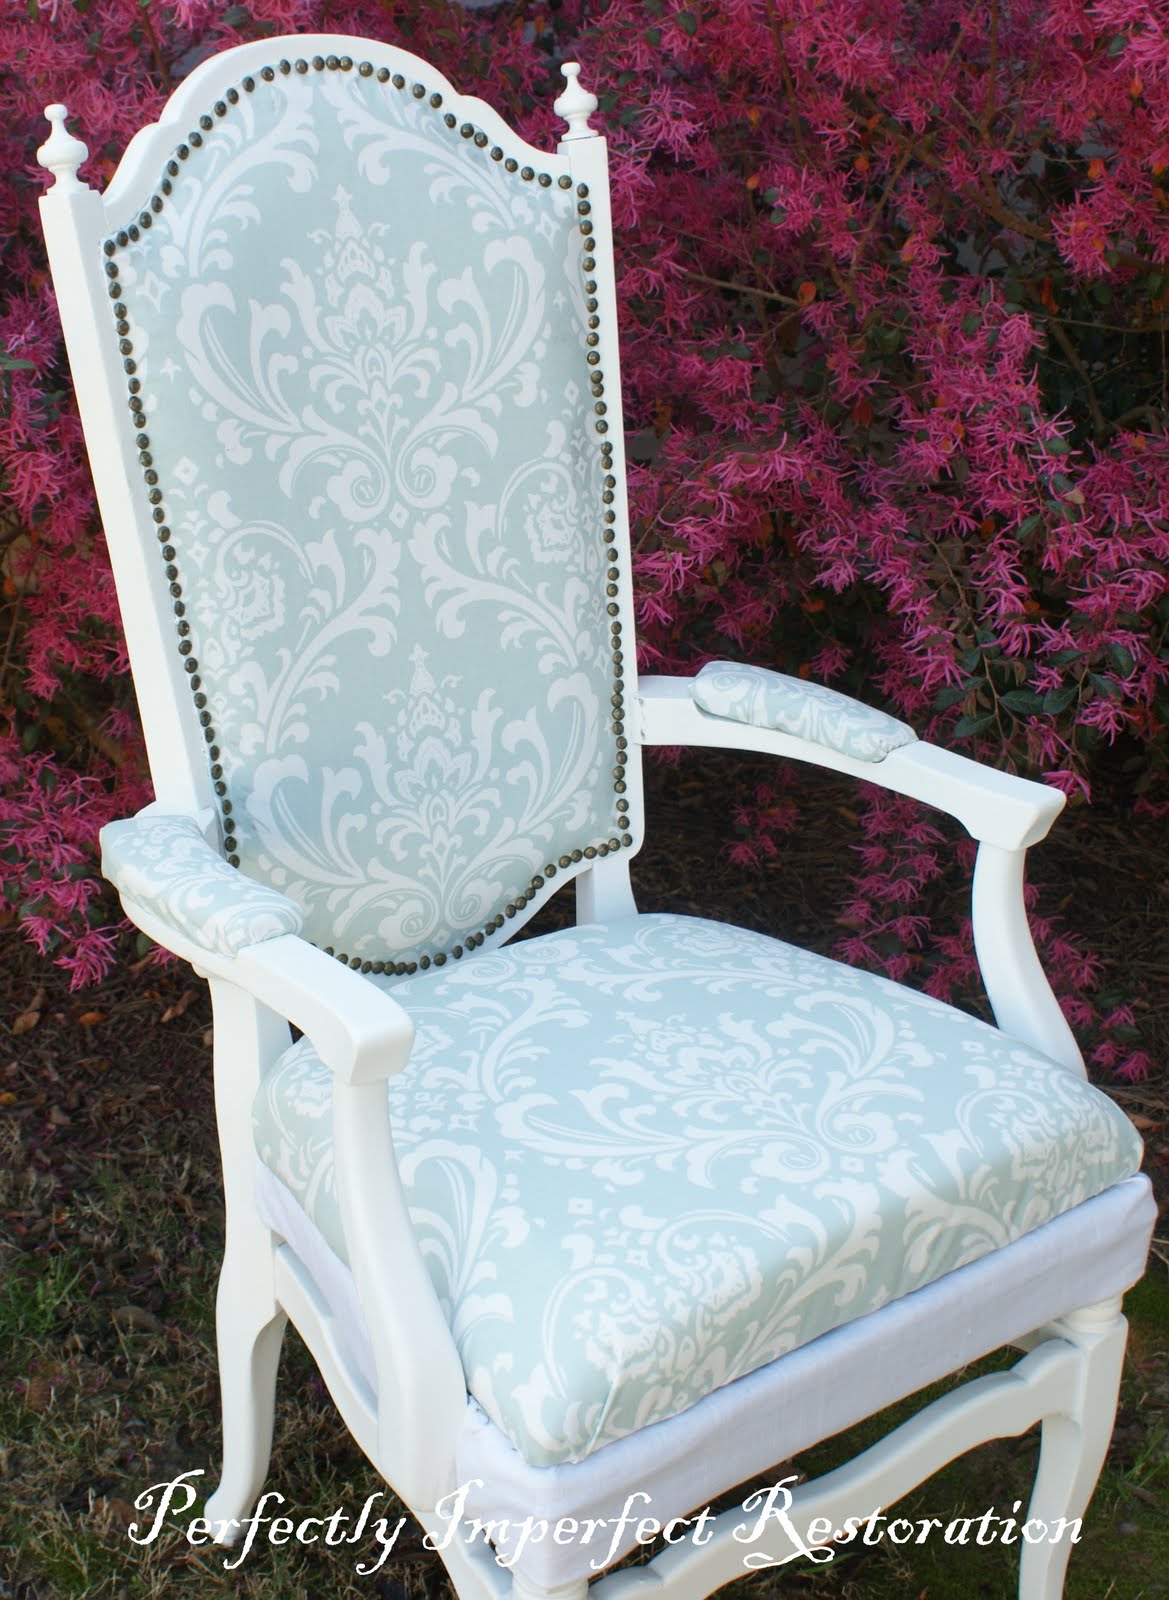
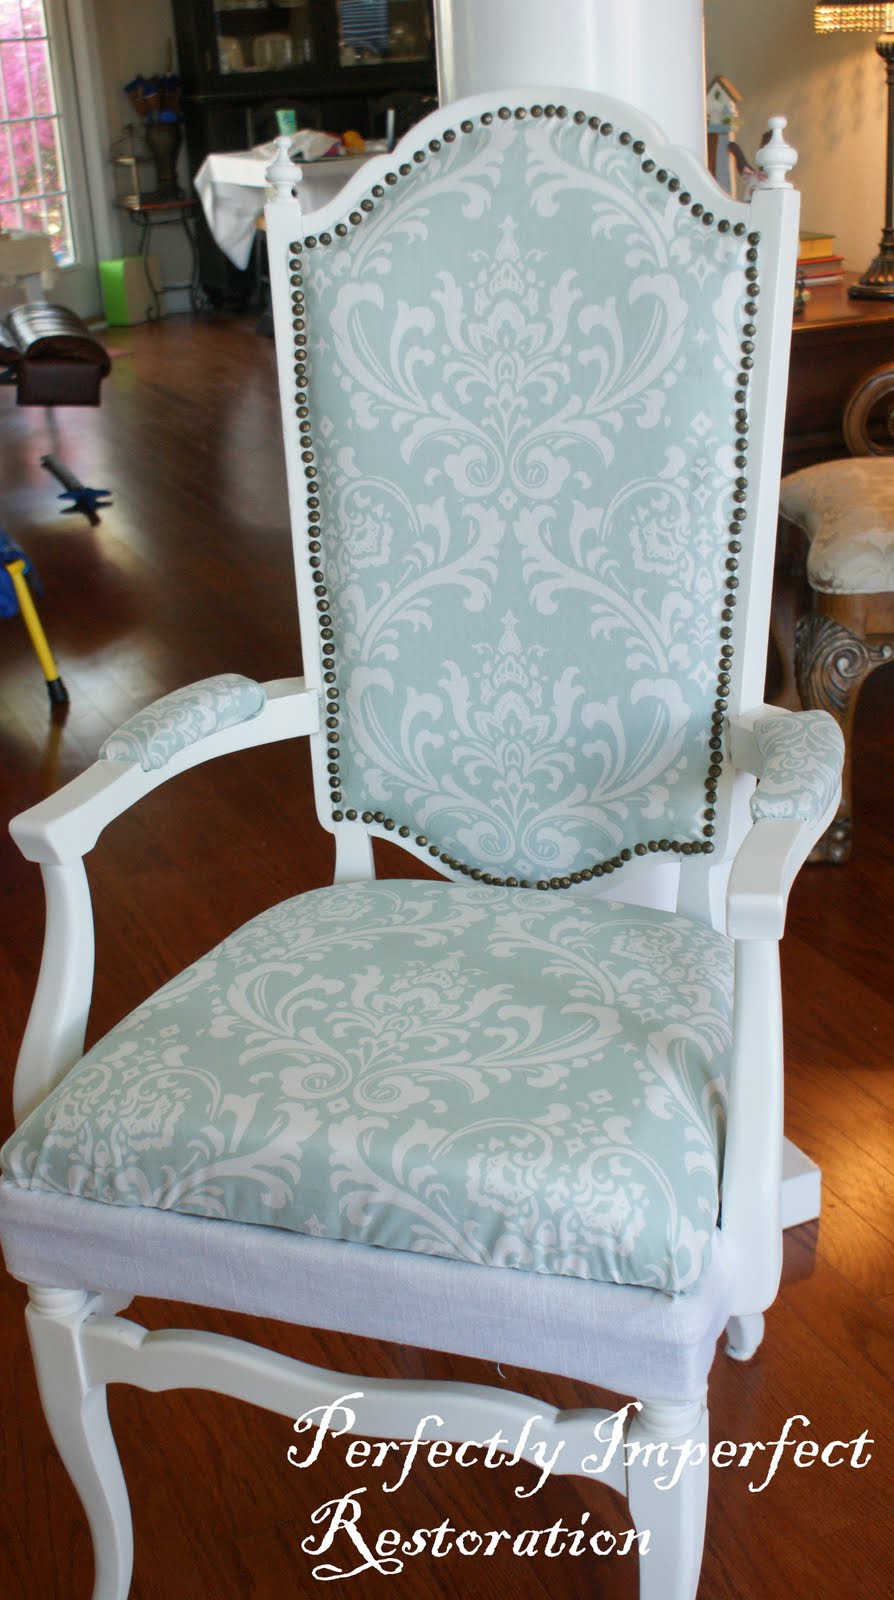
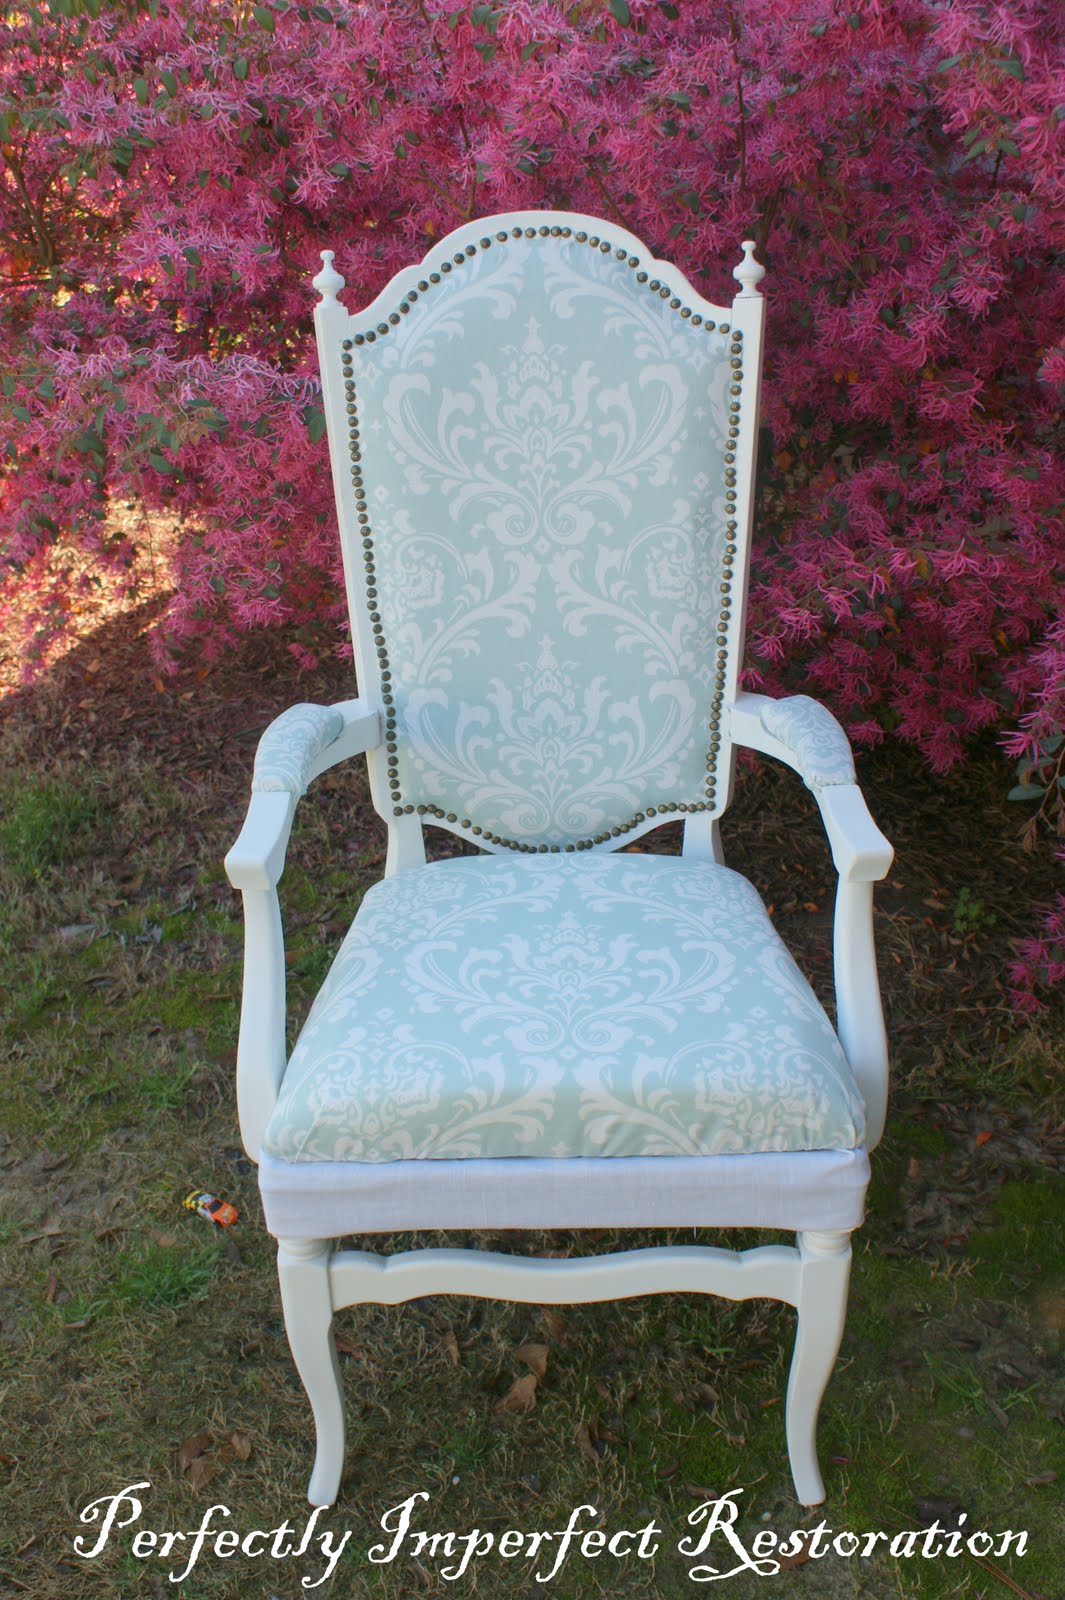
Here she is this morning:
Let me say, I’m just as excited to hear what you think as I am to have her completed!! Lots of work and two battered thumbs later, I might be a little anxious for some affirmation. Just maybe. 🙂
Okay, anybody care for lots of pictures and a tutorial??
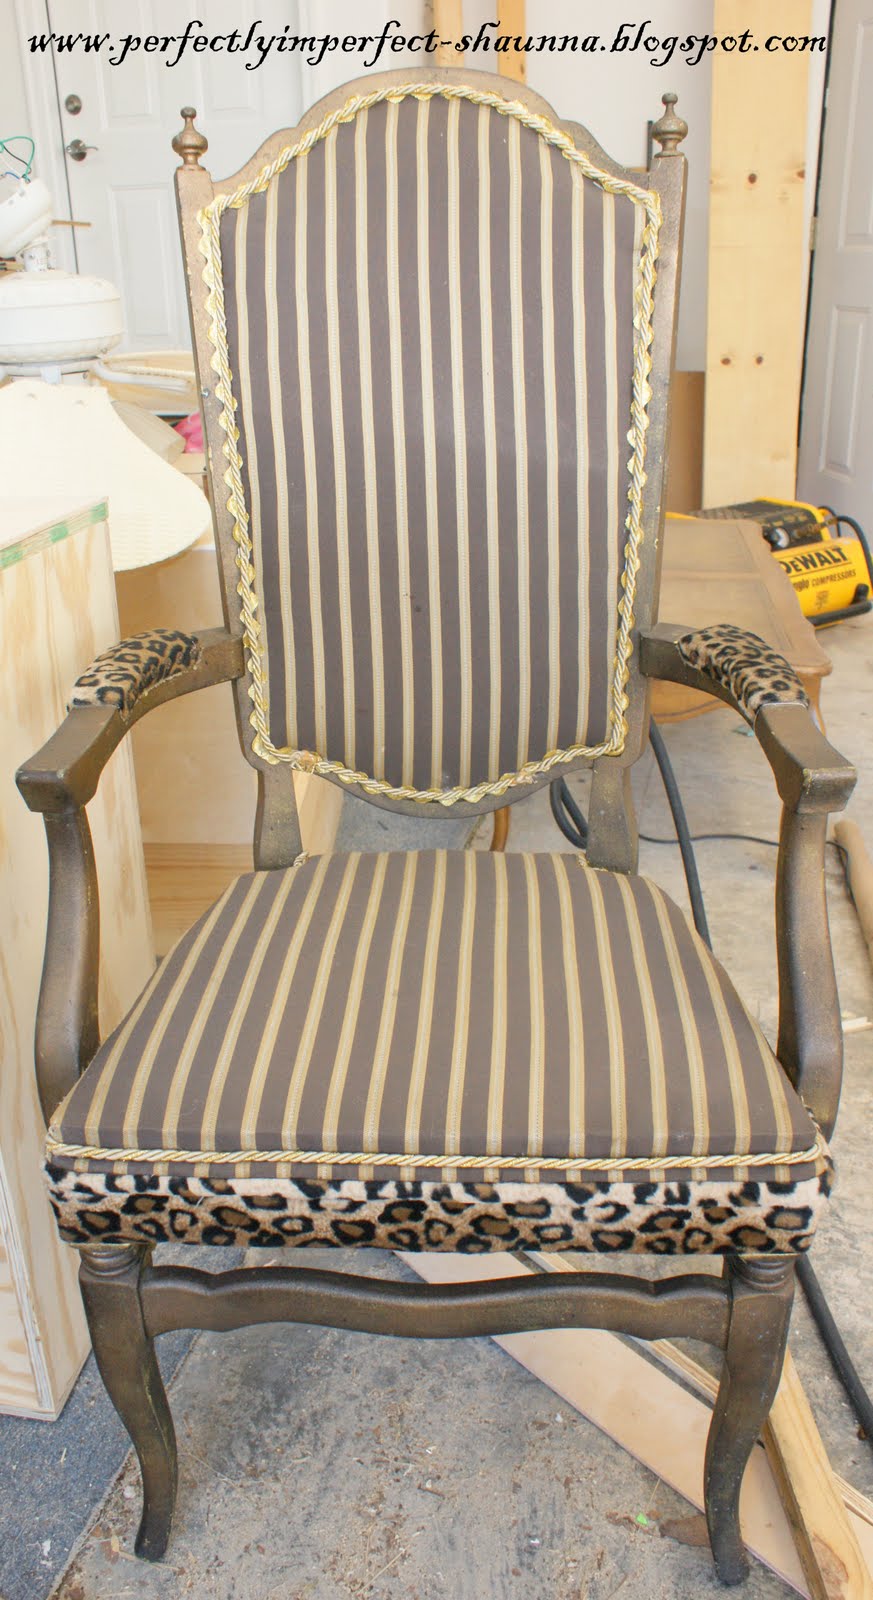
Let’s do it……let me say this before I begin: This was way more than just recovering a seat cushion. I’ve done that before and it’s a pretty straightforward job….this old gal had a LOT going on underneath her “dressing.” I posted about some of the trouble here.
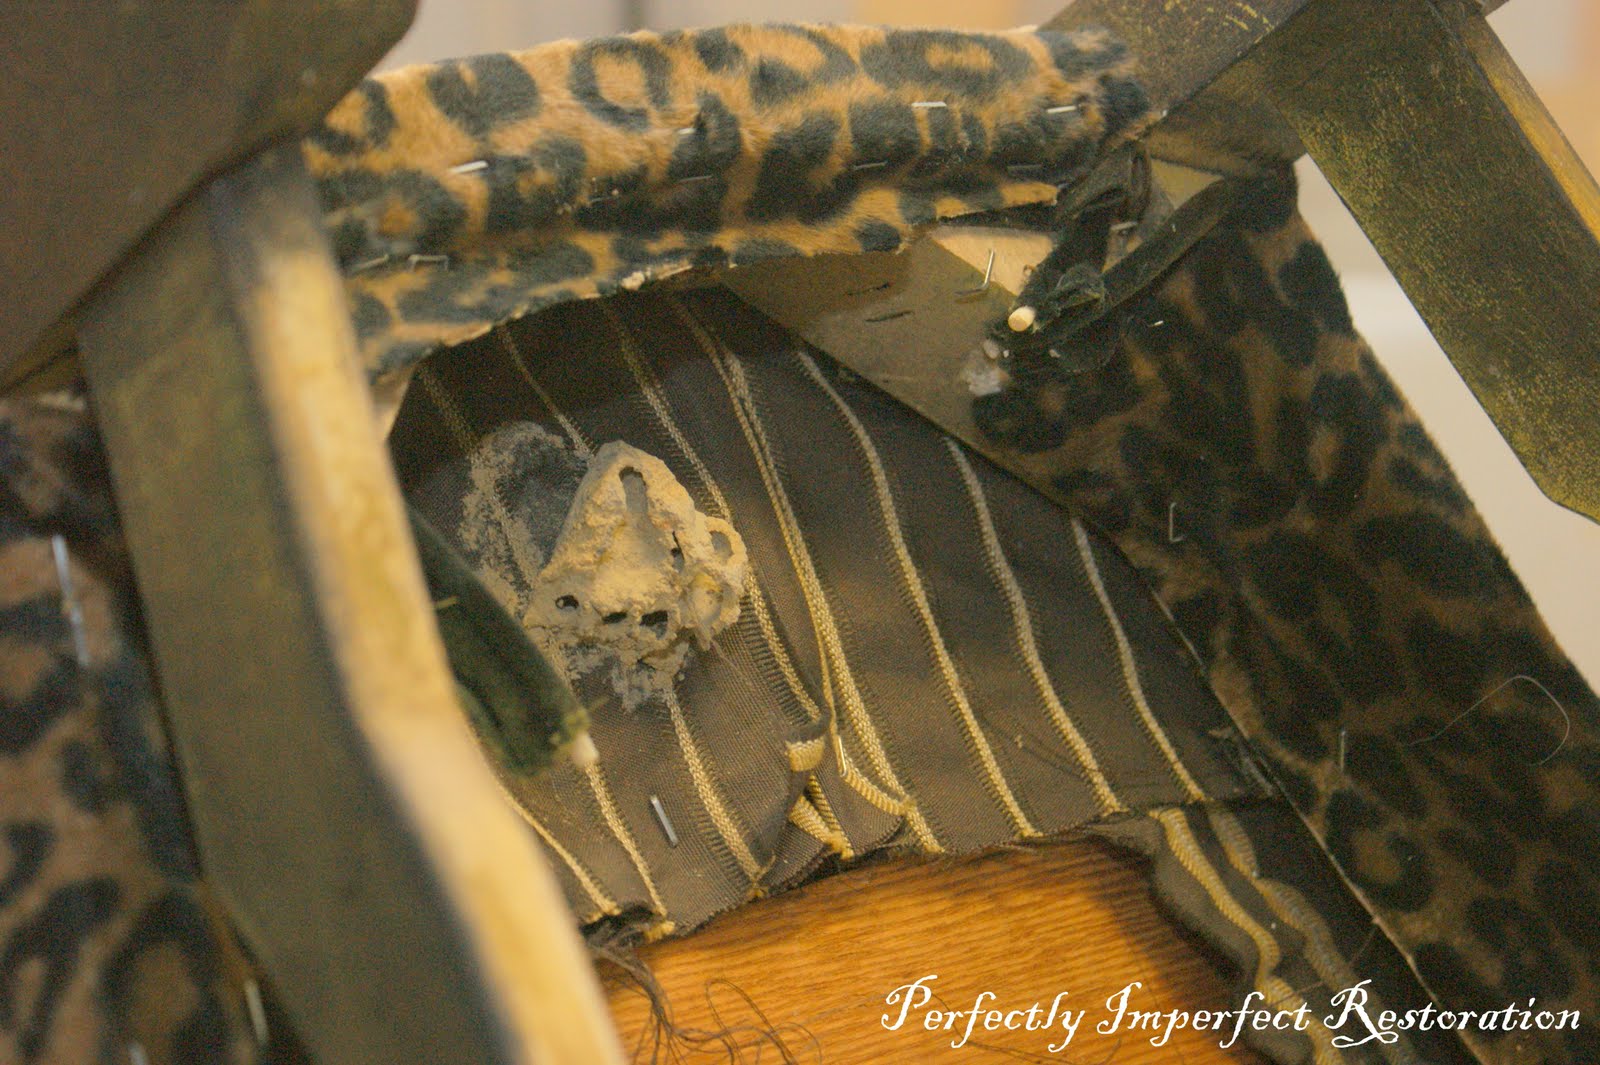
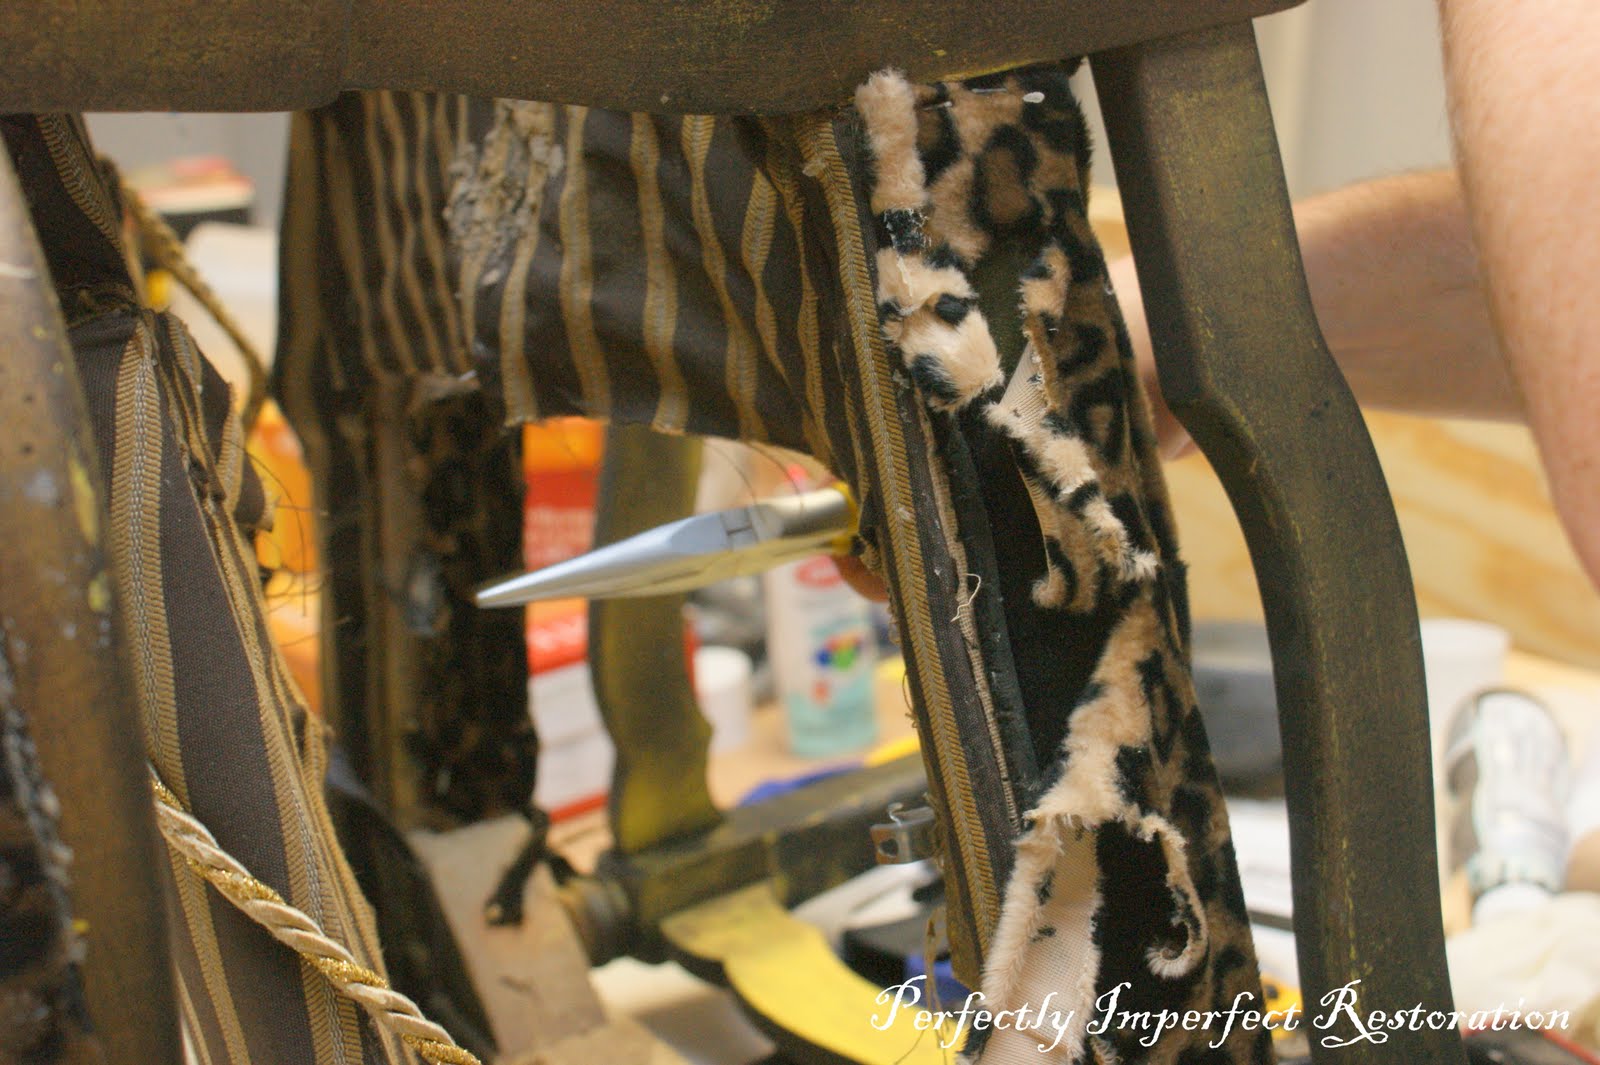
One of the problems was the massive amount of prep work to be done…..I know I pulled 300 staples out of the framework from the previous reupholstery job. If you can call it that….fuzzy leopard and ric rac…..and LOADS OF GLUE.
First, I had to remove staples, and all the previous fabric. (notice the back of the seat does not come out of the frame….I was going to have to reupholster new fabric into the back cushion. Yikes.)
I also showed you the dirt dobber nest….and I love that so many of you have asked what a dirt dobber is! Sometimes I forget that there is most definitely a different culture here in the South. A dirt dobber looks exactly like a wasp…just no stinger. 🙂
There’s the lovely nest and other yuck that I cleaned up.
We removed the seat cushion (with some force, I might add),

then I had to prep the chair frame for painting. On detailed pieces with small grooves like this chair, I like to use Gloss Off to strip the surface. It’s less tricky than true paint-stripper, dries quickly, and really helps the surface “grab” the primer.

Here she is….stripped down, primed and painted two coats of Valspar’s Delicate White (one of my favorites). I did use my Wagner sprayer, but even if you don’t have a sprayer, I would recommend using some of the latex spray paints out there….it is so much easier to cover all those hard-to-reach areas and grooves. Rustoleum has lots of options, like the famed “heirloom white.”

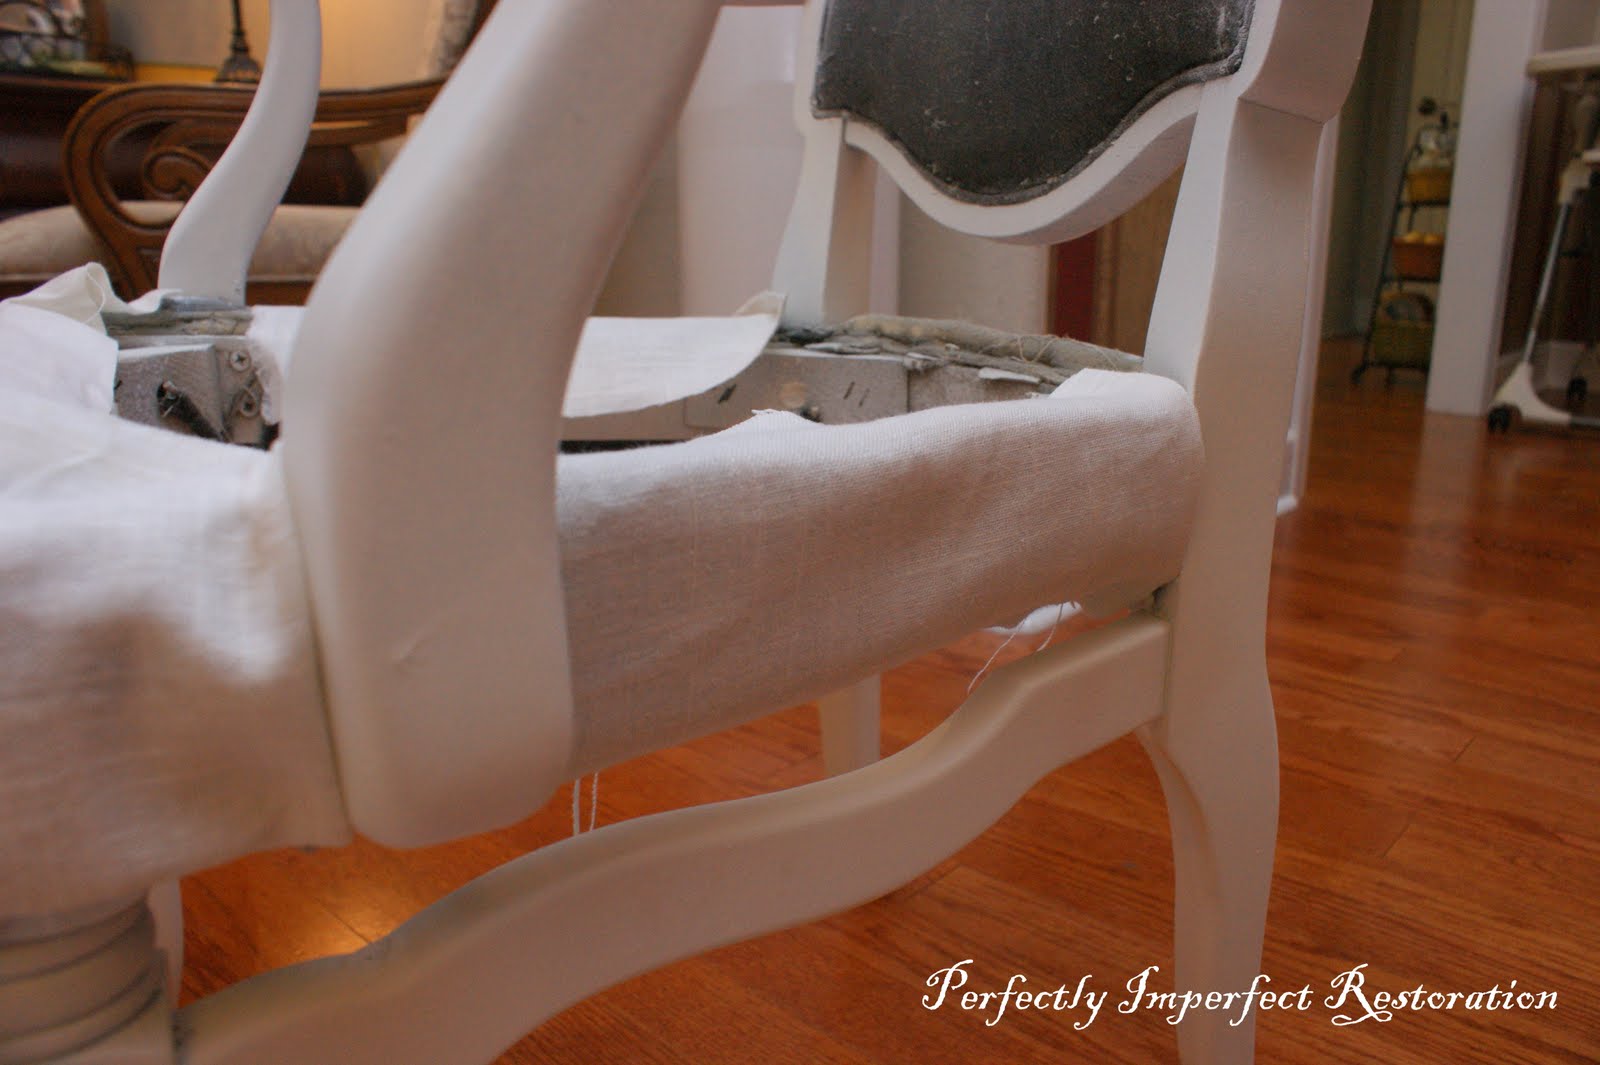
Next up for me was to cover the bottom frame of the chair with fabric….look back at the before…it was covered in fuzzy leopard. I chose a white linen….the original upholstery was glued on so tightly, I decided it would be better to cover than to restore that part. I chose the linen to off-set the formality of the nail head trim….I felt like it would blend seamlessly as the frame, but with softer lines.
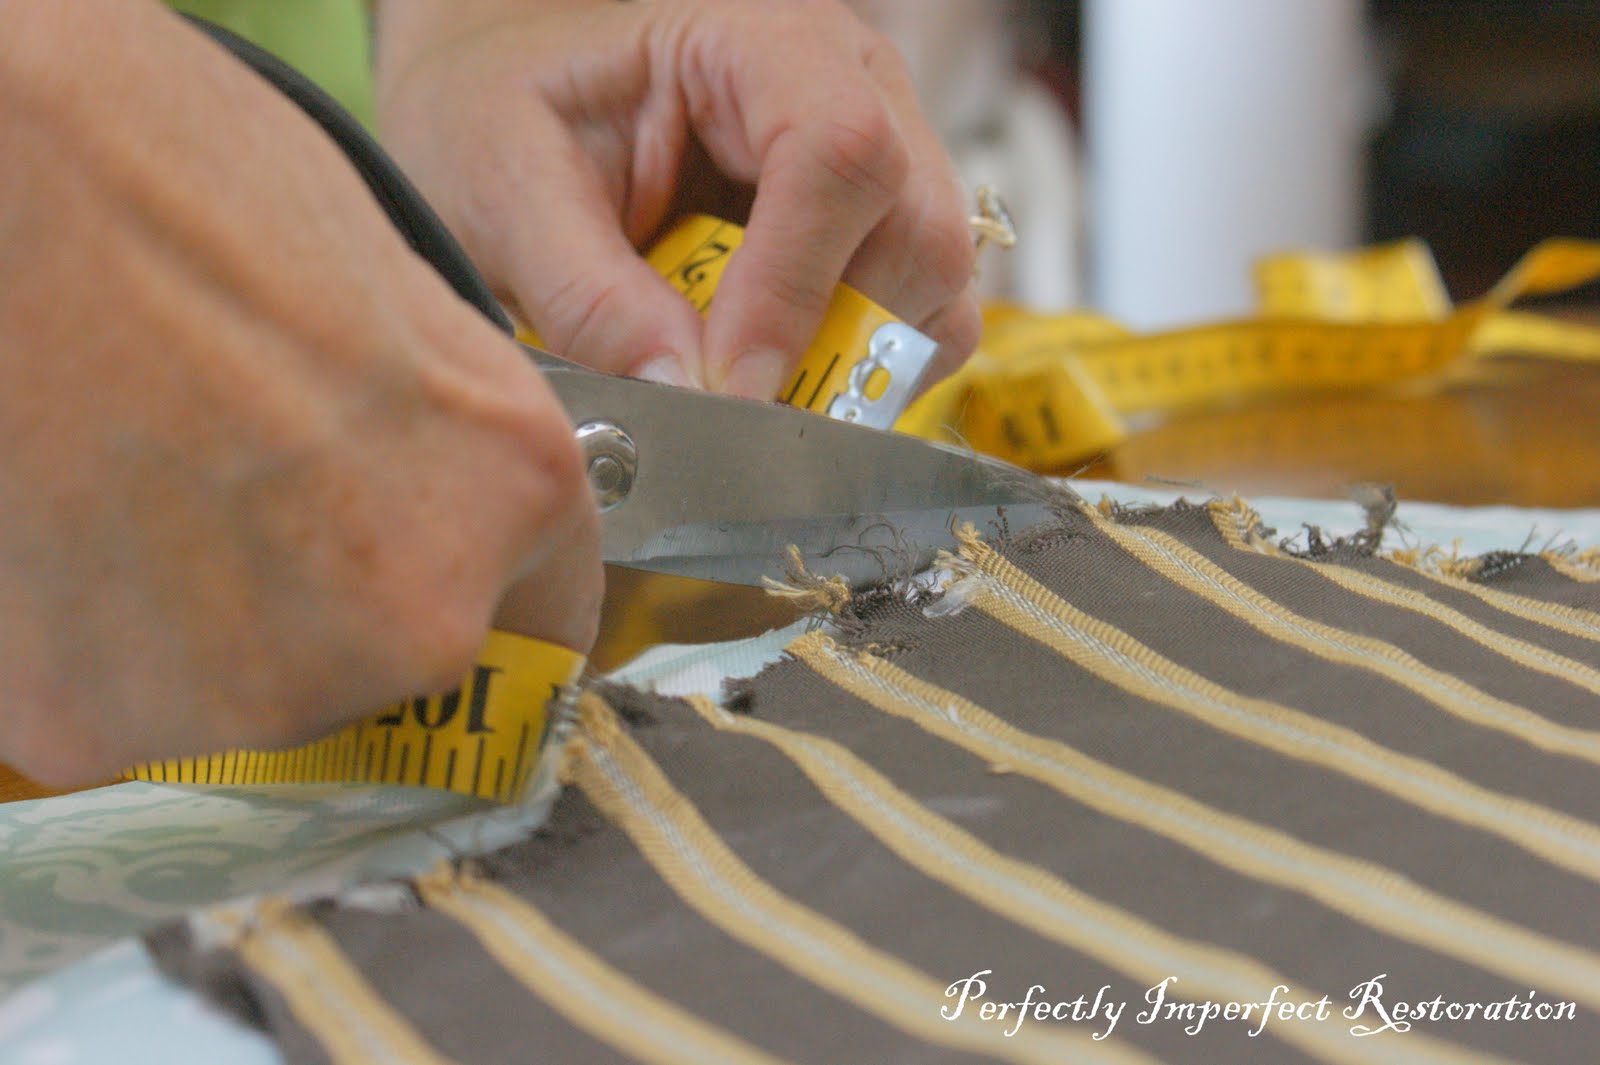
In case you have to do this one day….first, measure your chair…..length of fabric needed and width to wrap it.
I found it easier to wrap my fabric first as a practice run to be sure I had the right amount and that I was pleased with the look.
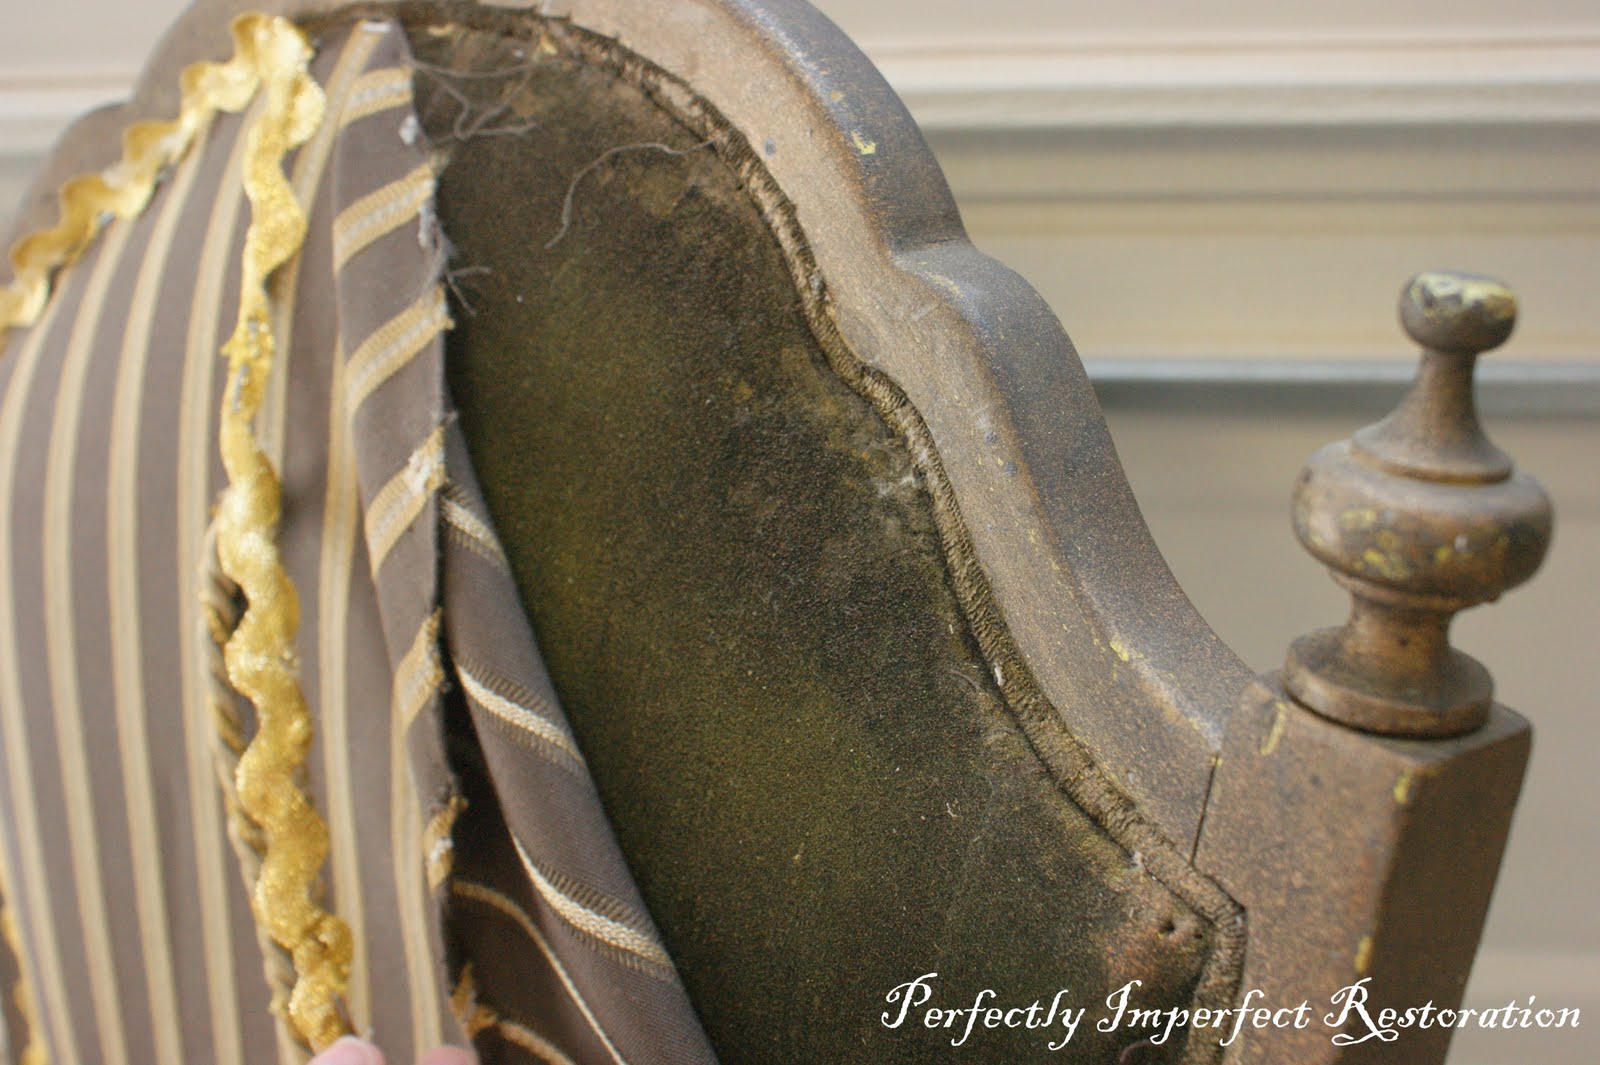
I then moved on to the back of the chair…..again, the back did not remove.

Luckily, I was able to separate the upholstery from the frame just a bit, and used my flat cricut tool to smooth the fabric into the frame….that part was great! No stapling, glueing, or praying. 🙂
Next, move on to your seat cushion….again, pretty straightforward.
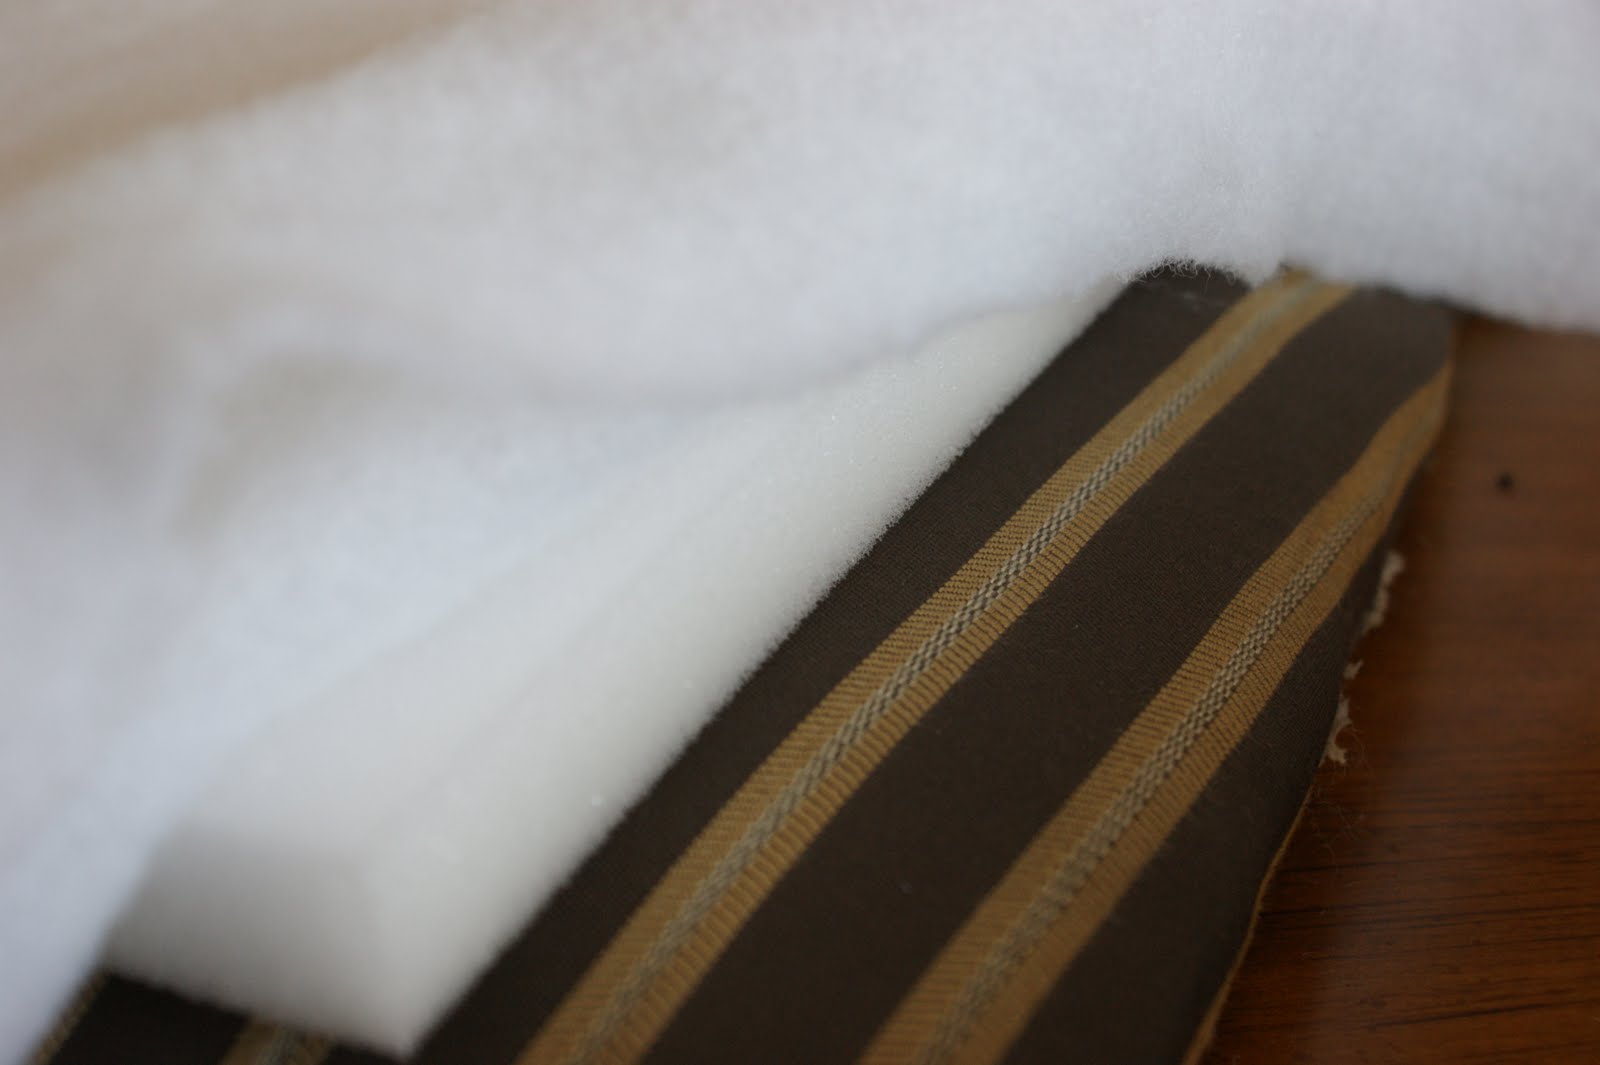
Choose your batting, and how much foam you want to add. I wanted the seat pretty comfy since this will be my desk chair, so I added 2 pre -cut foam cushions and filled in the rest (because of the angular shape of the seat) with pulled-apart batting.
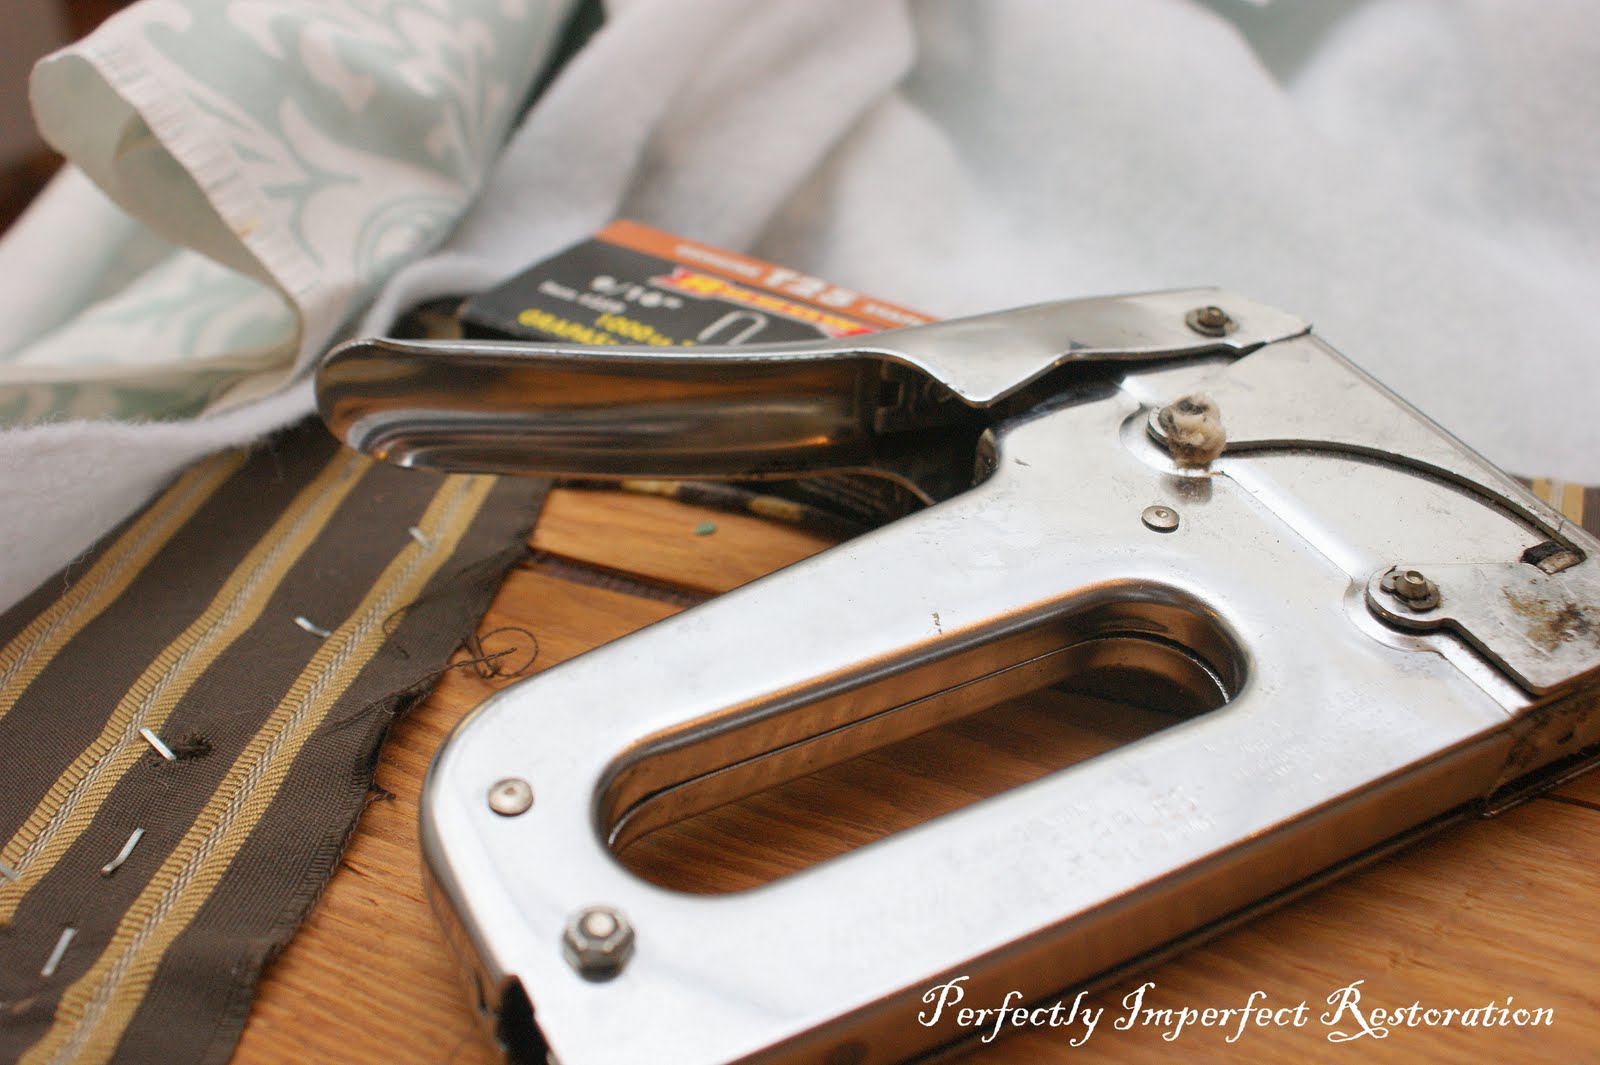
Time to break out that staple gun….and get ready to use it. A lot.

I found this fabric (that I love, by the way) at Fabric.com on clearance for $5 a yard!!! It was normally $25 a yard; thank you! I am sure most of you brilliant ladies know this, but when you are recovering seat cushions, it’s been helpful to me to start in the corners first. At least, begin pulling there so you can control where the seams will be….I definitely wanted those in the corners. Just keep working it around and when you feel good about it, staple away!
Next, I covered the back…..this was definitely the hardest part…on my nerves and my thumbs. 🙂
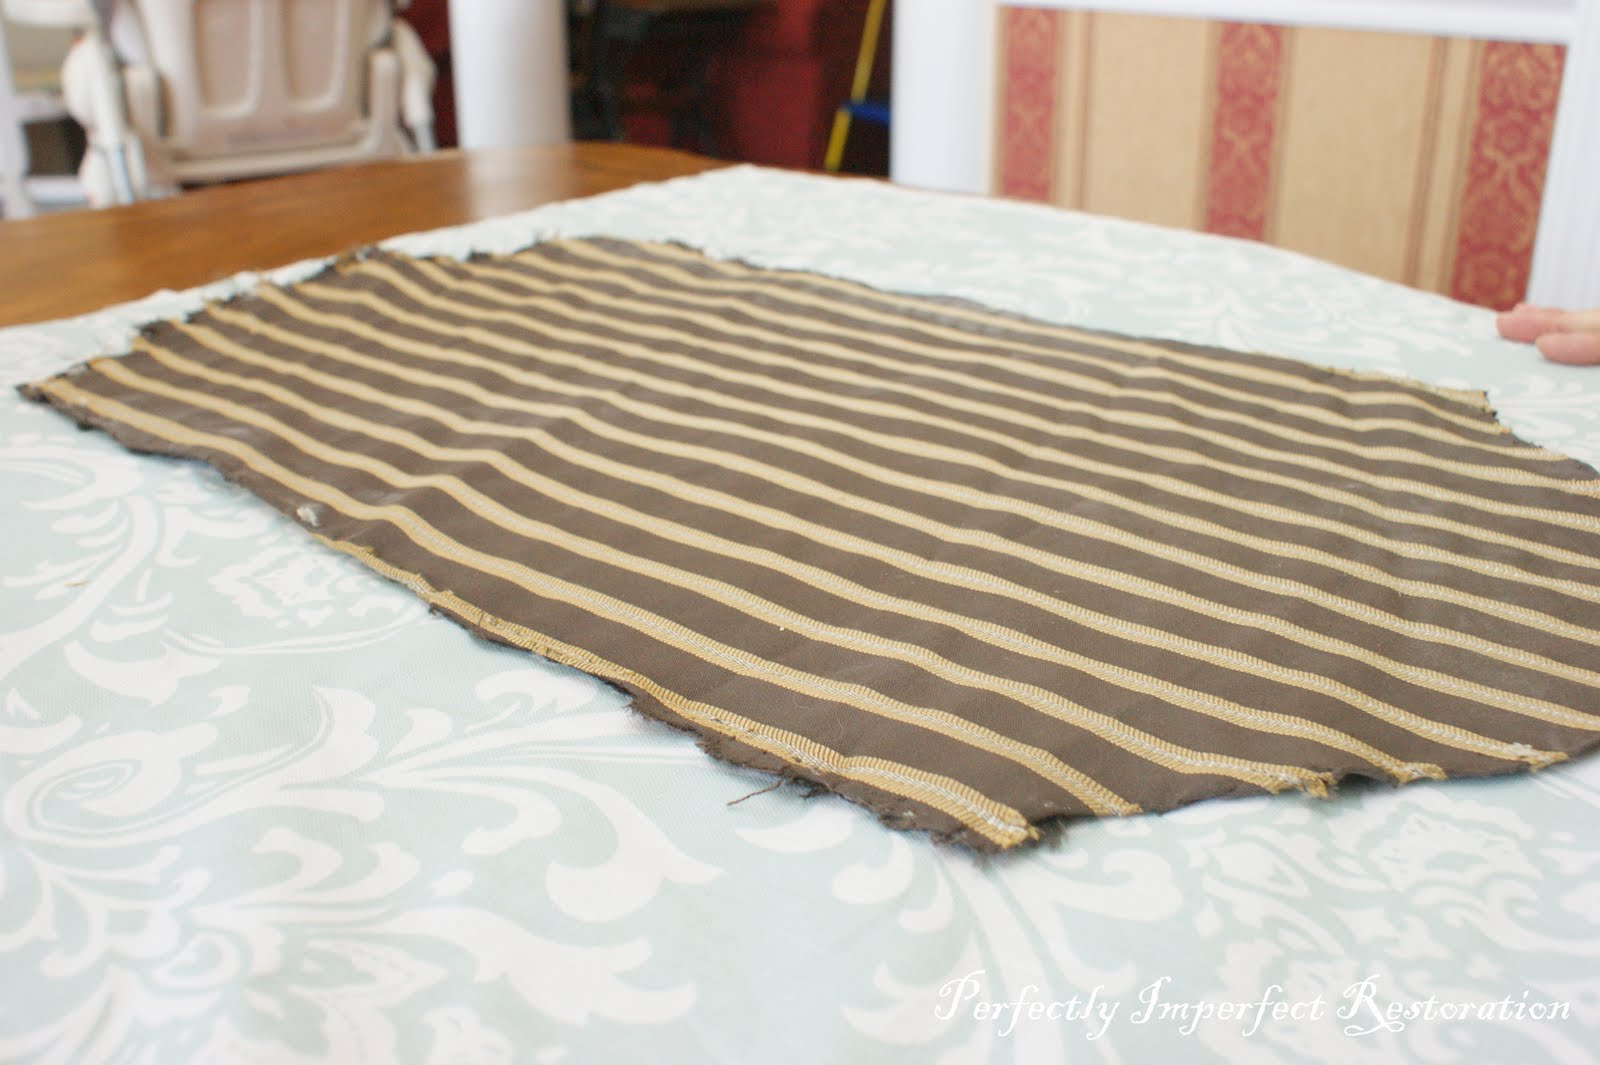
I save the old fabric and cut out a piece of the new fabric 1/2 inch larger so I could fold it under for a smooth edge.
Those are my mom’s sweet hands…I asked if she would come over to watch me nail in the first upholstery tack….have I mentioned that I refinish furniture? More painting, less complicated upholstery (and I know as I say that, there’s someone out there reading who does the complicated upholstery in her sleep–go you, by the way! you can give me some good tips!)
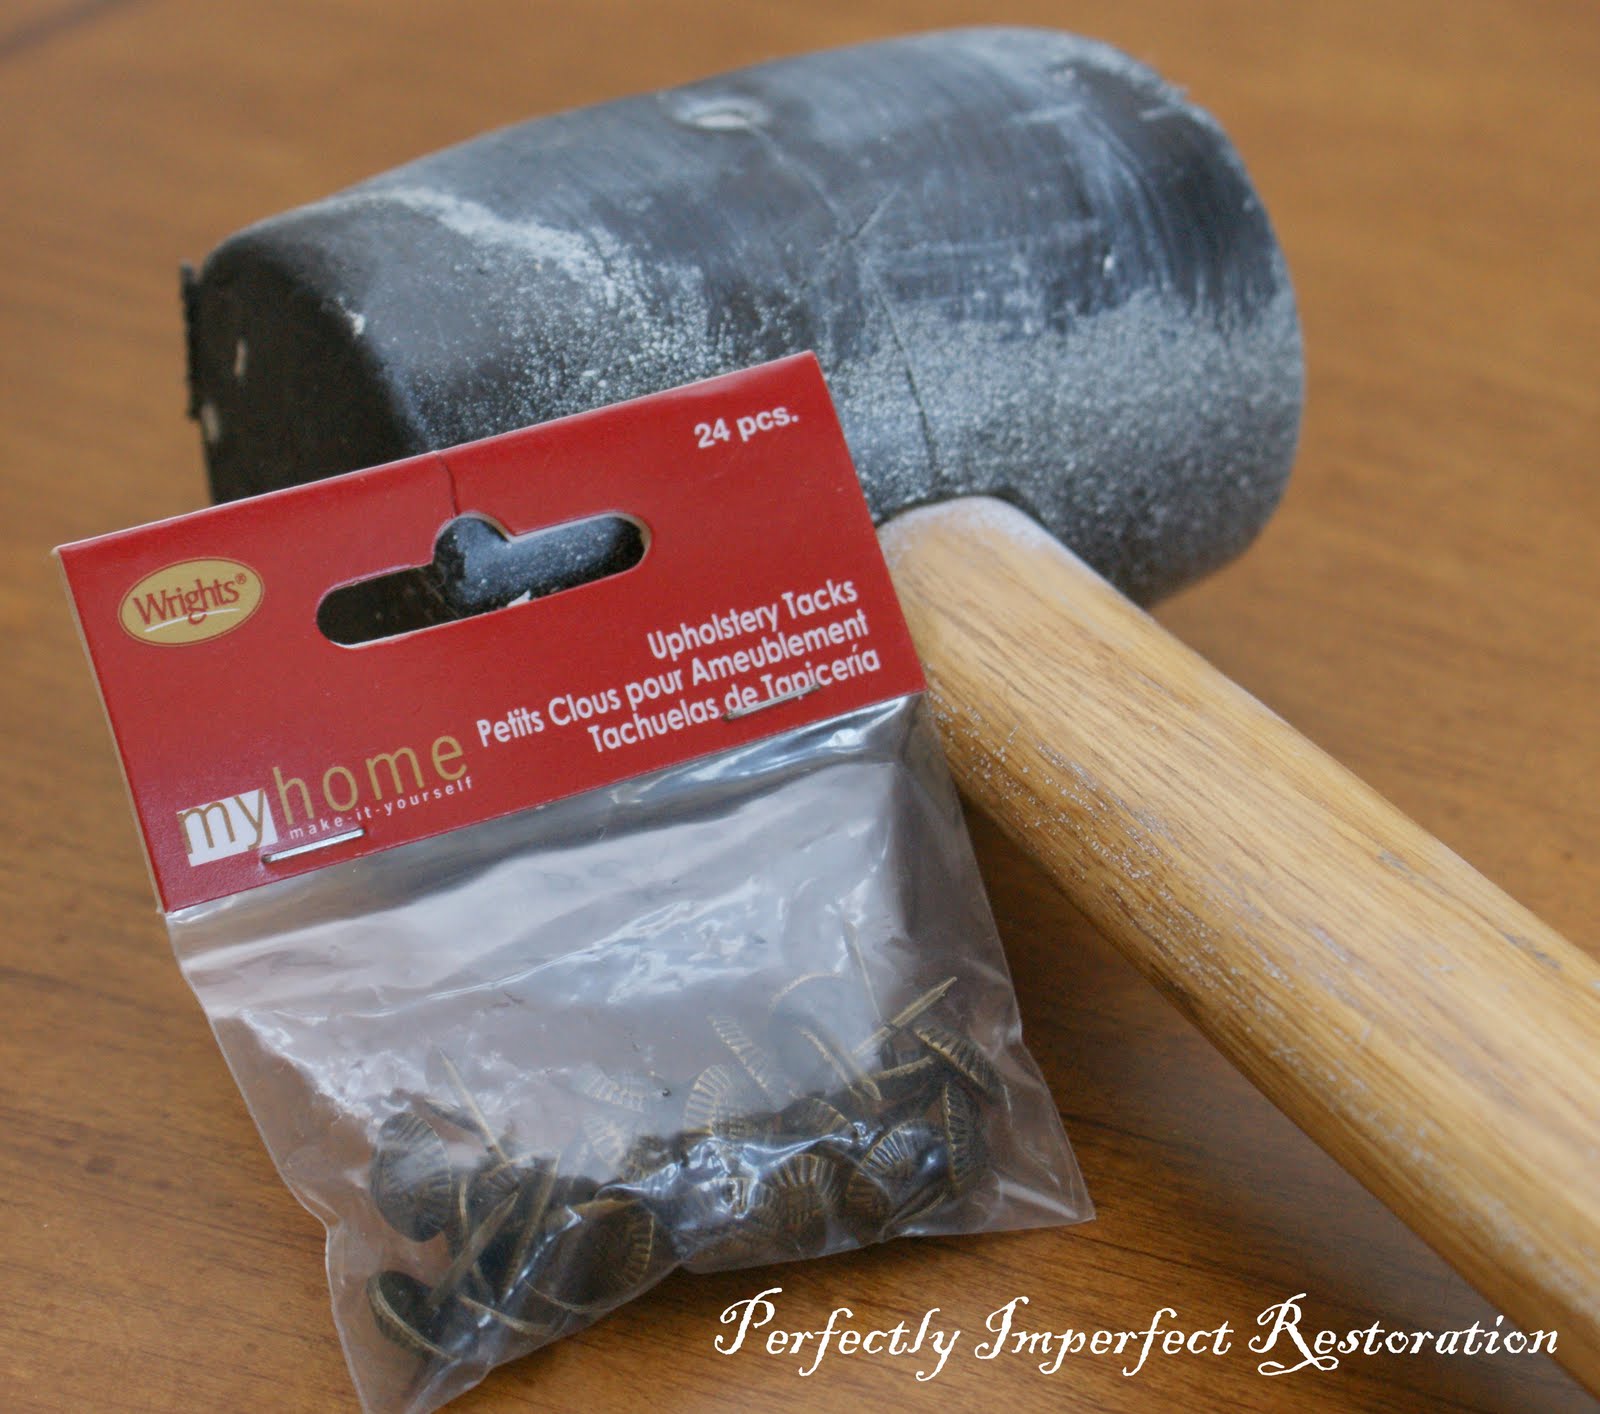
I bought simple upholstery tacks in an antique bronze….I searched high and low for actual nailhead trim that comes in one long piece….with no luck. I was VERY nervous about the line being really crooked, but all in all, it turned out fine. Not perfect, but I love it still.

One little tip: it helped me tremedously to place each tack in partially with the rubber mallet, then use my pliers to rearrange any that “stuck out”, and then my Matt nailed them the rest of the way down with a small hammer. (I think he could see that my thumbs were literally swollen from placing each tack.)

Sweet Darla is not actually totally complete….I think I’ll add some tack trim around the arm upholstery, and possibly the very bottom of the linen. Not sure….I like the softness the linen brings.
I’ll reposition a few more tacks, and I’ve got to seal her with verathane…. I’ll post later on why that’s my favorite. And you know what else? I haven’t even screwed the seat and recovered arms back in…I was just TOO excited to show the reveal to all you guys!
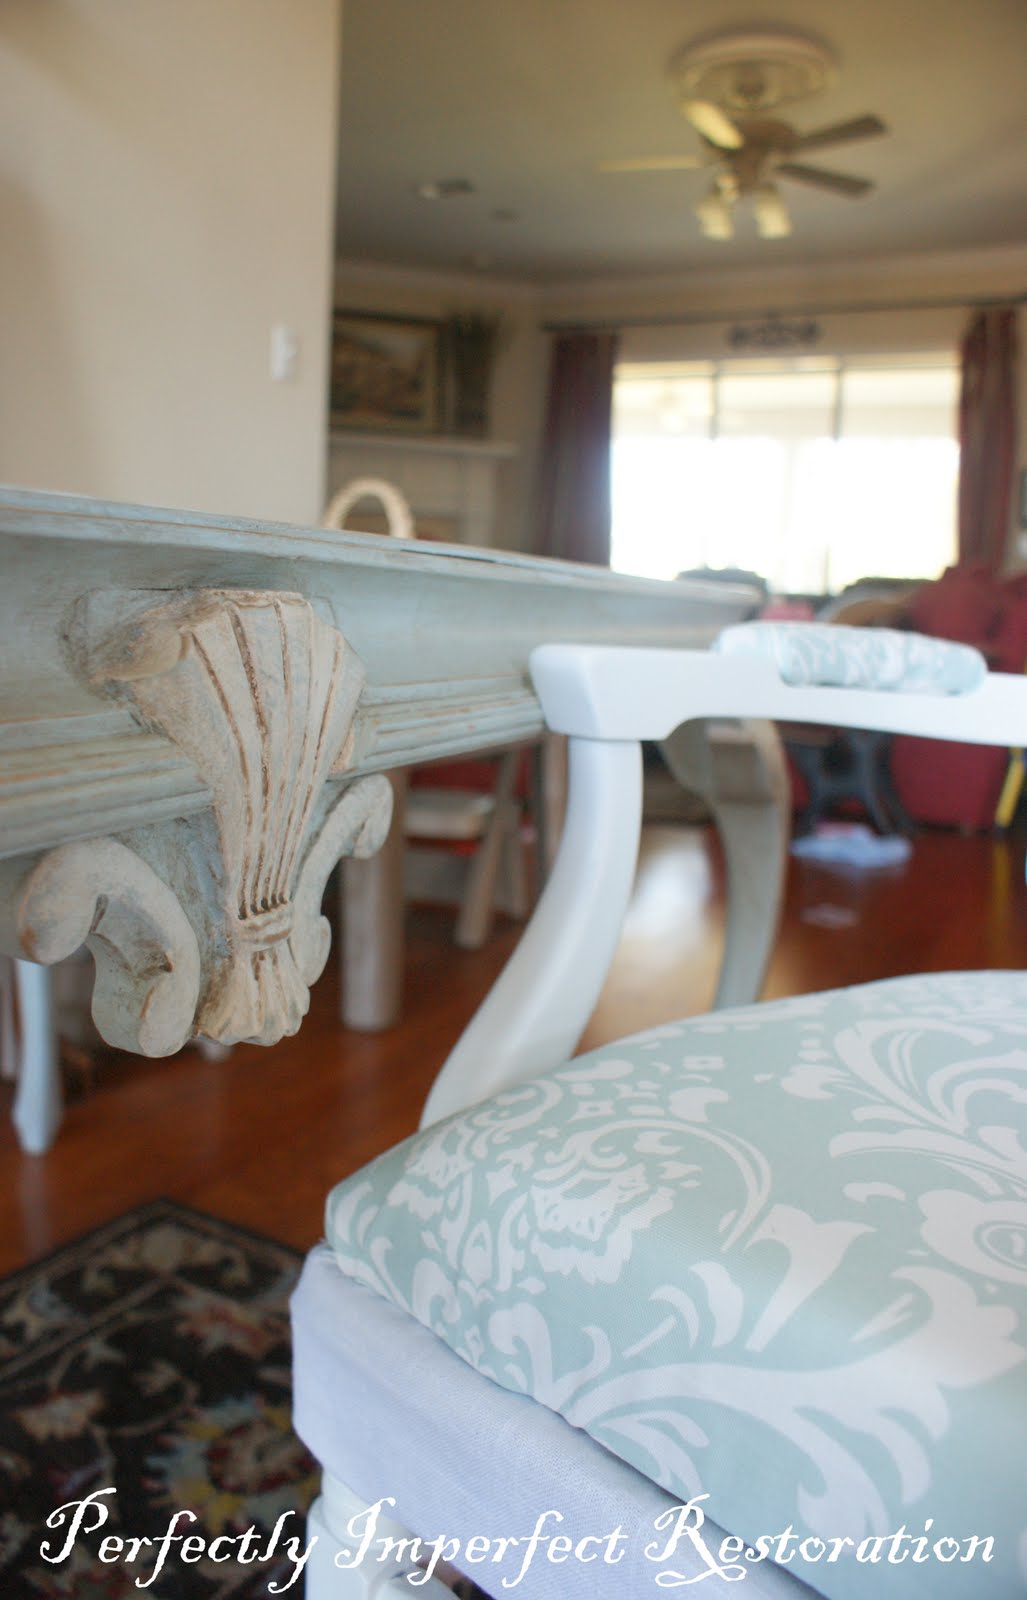
Here she is next to the desk she will accompany….this is a turn of the century table I found that I’m raising to turn into a desk for the writing room. I love the idea of all that surface space!

I love all the sweet details, like the spindles at the top and the curves all along the legs.
One more shot (because I’ve clearly not given you enough 🙂
Okay, you know I’ve got to know….tell me what you think?? I hope she didn’t disappoint!! It was so much fun to restore something for my own home…I’ve been sending those pieces out the door lately. 🙂
Have such a great day today!
-shaunna 🙂
**Linking this post to:


I love it, Shaunna! You put in a lot of work on this baby! She looks wonderful in white and I love the fabric you chose.
You did a great job Shaunna! I love Darla's new look! Darla is as sweet as I knew she would be! After seeing all those tacks, I can just imagine what your thumbs looked and felt like by the time you were done. Yes, mud dobbers is definitely a "southern thang."
She's beautiful! You did a fantastic job! I love the fabric and white!!!
This is beautiful. I've never had the courage to tackle a piece of furniture with fabric. Yours turned out wonderful!
Darla is absolutely gorgeous, albeit a little difficult by the sound of it but definitely worth it:)
The chair looks great Shaunna!
Hi, it is stunning!!! I love it….Kathy
She is GORGEOUS! I LOVE that you had the vision for her! That is certainly a gift! (And btw, I'm making a mental list of all the 'new' furniture that might just show up at my house after I come visit you! HA!)
Wow, Darla looks absolutely fabulous!!
Love your chair!!! Course I know what a dirt dobber is!! 😉
Darla turned from the ugly duckling to a beautiful swan!! Love those colors!!
Awesome job on this!! I am working up my nerve to do an upholstry job like this but haven't had the courage yet! I LOVE the fabric you chose!!
It's gorgeous Shaunna. I love your choice of fabric. So fresh. Beautiful work! I'm just finishing off a chair of my own at the moment and am hoping to reveal it next week. When I do, please stop by and let me know what you think!
Great job! You have patience and creativity! Love the fabric and choice of white. It turned out so beautiful. Be proud!
Exquisite re-creation!
WOW girl! What a transformation!! Great job!!
I've been dying to see how Darla turned out. I love it! Of course, those are my colors….so you're singing my song. Great job….what will you do with her? Lisa~
Aahhhhhhhhh!!! Shaunna! I love the blog page! It looks awesome and so you! Loving that chair too….I mean if you get tired of looking at it….hope Gray is feeling better.
I love this! The color is perfect and your work is beautiful!
Wow! I'm speechless. Best makeover I think I've ever seen!
What an awesome labor of love! It looks wonderful!!!
She turned out beautifully! You know when I first saw her not that long ago (prior to her transformation), I really didn't think she was too bad….Now I can't believe I thought that. I didn't realize her potential. She has totally blossomed and is beautiful. you did a remarkable job and she is definitely very "bragable". Thanks for linking to the boardwalk Bragfest!
Great job. I too love to reupholster small chairs that can be done in a day or two. I of course love the white, but the fabric is cute too. Any more chair make overs in the future. I will be looking.
It is gorgeous! Great job!
She's gorgeous! You did a fabulous job!
Your chair is beautiful! I just recently decided to reupholster and paint an old chair I was going to get rid of. Can you imagine? I'm so glad I still have it! Thanks for sharing!
It looks fabulous! Clearly a labor of love. Thanks for the tutorial. One of these days I'm going to attempt an antique chair I have that desperately needs recovering.
What a wonderful job you did. I love it. This maybe my next project. Thank you so much for sharing.
I am working on a similar project this weekend!!
Great job! Love the color and fabric choices. Dropping by from Faded Charm. I hope you'll come over to AtticMag to see my White Wednesday find (#1) We're having a giveaway – registration ends Sat 5pm EST, so hurry over.
So regal and gorgeous…. you can see how much work you put into it… but SO WORTH IT.
That is just stunning! Love how you named her too!
Purrrrr-fection! LOVE THIS!!
You did an awesome job on your chair transformation
What a pretty chair…I just love the colors. You've definitely put a lot of love into it!
So gorge! LOVE the fabric!
She is lovely. Thanks for the tutorial! Now that I no longer have cats, I want to do some upholstery work.
Beautiful! I would love to design a whole room based on that — and thanks for the great how-to pics!
So pretty!
I'm giving you a big WOW… that is one serious tranformation!
Woops… I meant transformation.
STUNNING!!
That chair is a masterpiece. Wonderful job!!!!
Shaunna,
I LOVE THIS CHAIR! trying not to covet it actually, but I saw you said you used "Gloss off" and I have been searching for a product desperatly! When we bought our tiny cottage it had a built in entertainment center that is massive! It has 16 shelves & 8 doors across the bottom. Someone had painted it before we moved in, I didnt like the color so I repainted, it took 3 coats. I used a Semi Gloss in dark brown but its way too dark for our space that gets hardly any natural light but Ive made the brown work for 4 years because my husband refused to let me re paint since he knew he would end up stuck helping. He said the painting isnt the problem but the sanding of 3 coats of brown and God only knows how many coats of blue that was here to begin with. How does this gloss off work?
also, I love the picture in the top righthand of your blog of the white table with the black pull and the distressed paint, thats the look Im going for (good thing about distressed is having 3 kids under 5, if they nick it, who cares?) do you have a recommended paint color to achieve that off white? What finish do you use? I love your blog!